WeCom approvals
The provider screenshots in this guide show its Chinese interface.
Configure the approval engine
- Sign in to CloudDM with permission to manage integrations.
- Prepare the credentials in WeCom app setup.
- Open Integrations > Approval Engines.
- Click Add and select WeCom Approval.
- Enter App ID, App Secret, and API Timeout (seconds). Turn on Enable Immediately if needed.
- Click Add.
WeCom app setup
info
You can use the same WeCom app for single sign-on and ticket approvals, or configure them separately.
Before you begin
- Sign in to the WeCom admin console.
- Prepare a domain through which the CloudDM Console can be reached from the public internet.
Configure the app
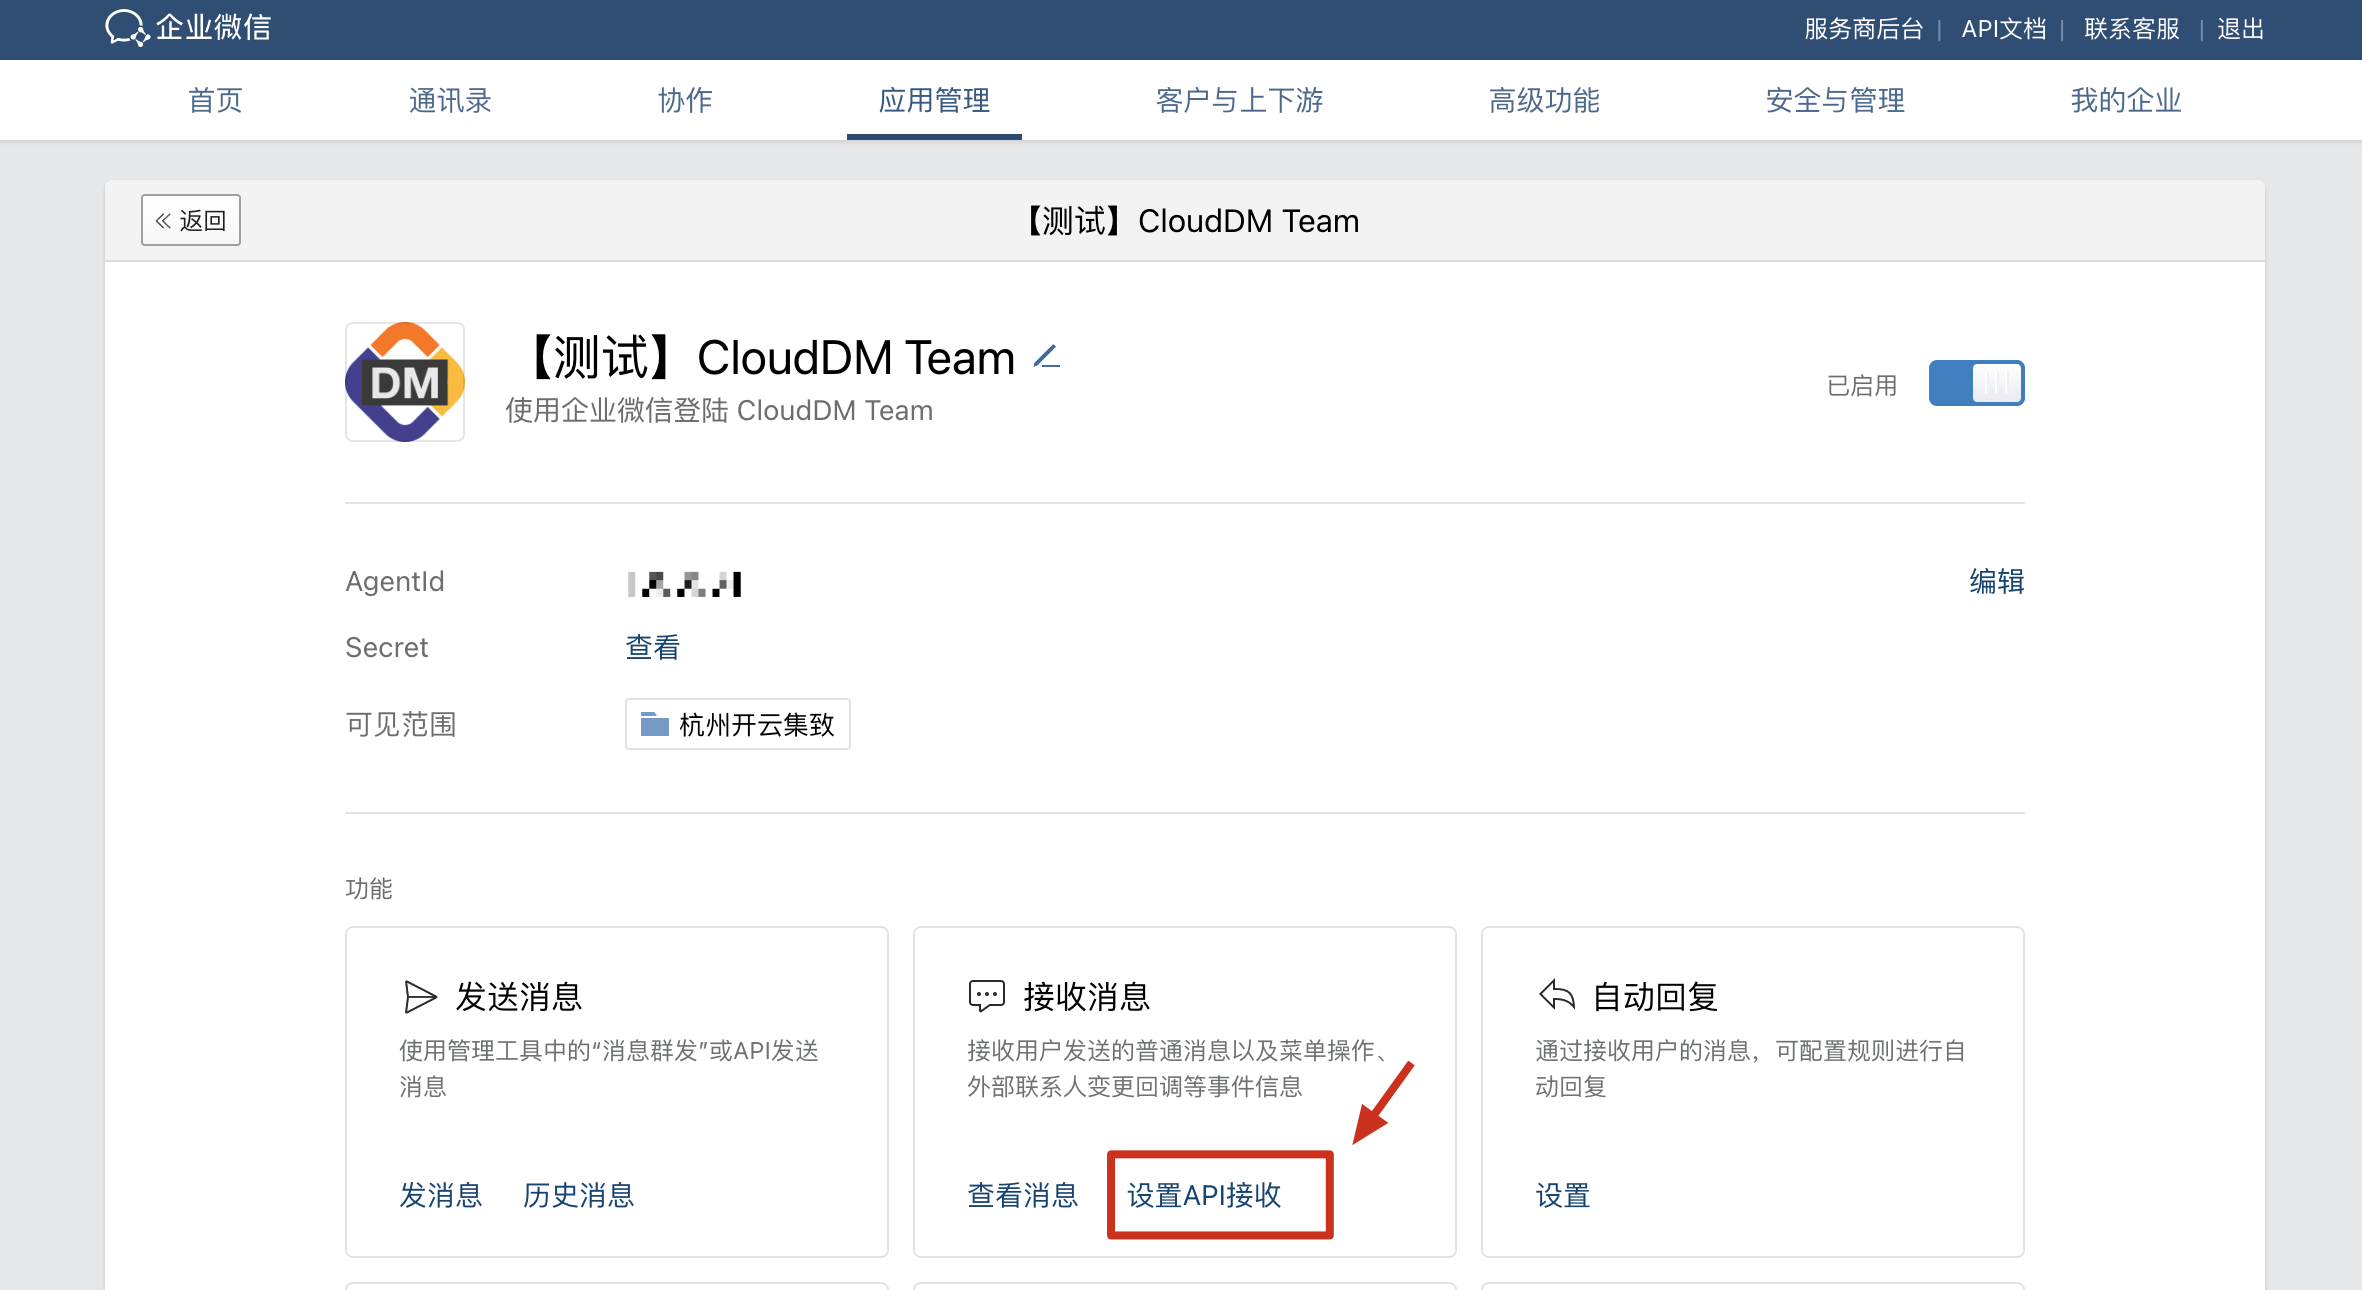
- Open App Management > Apps > Create App.
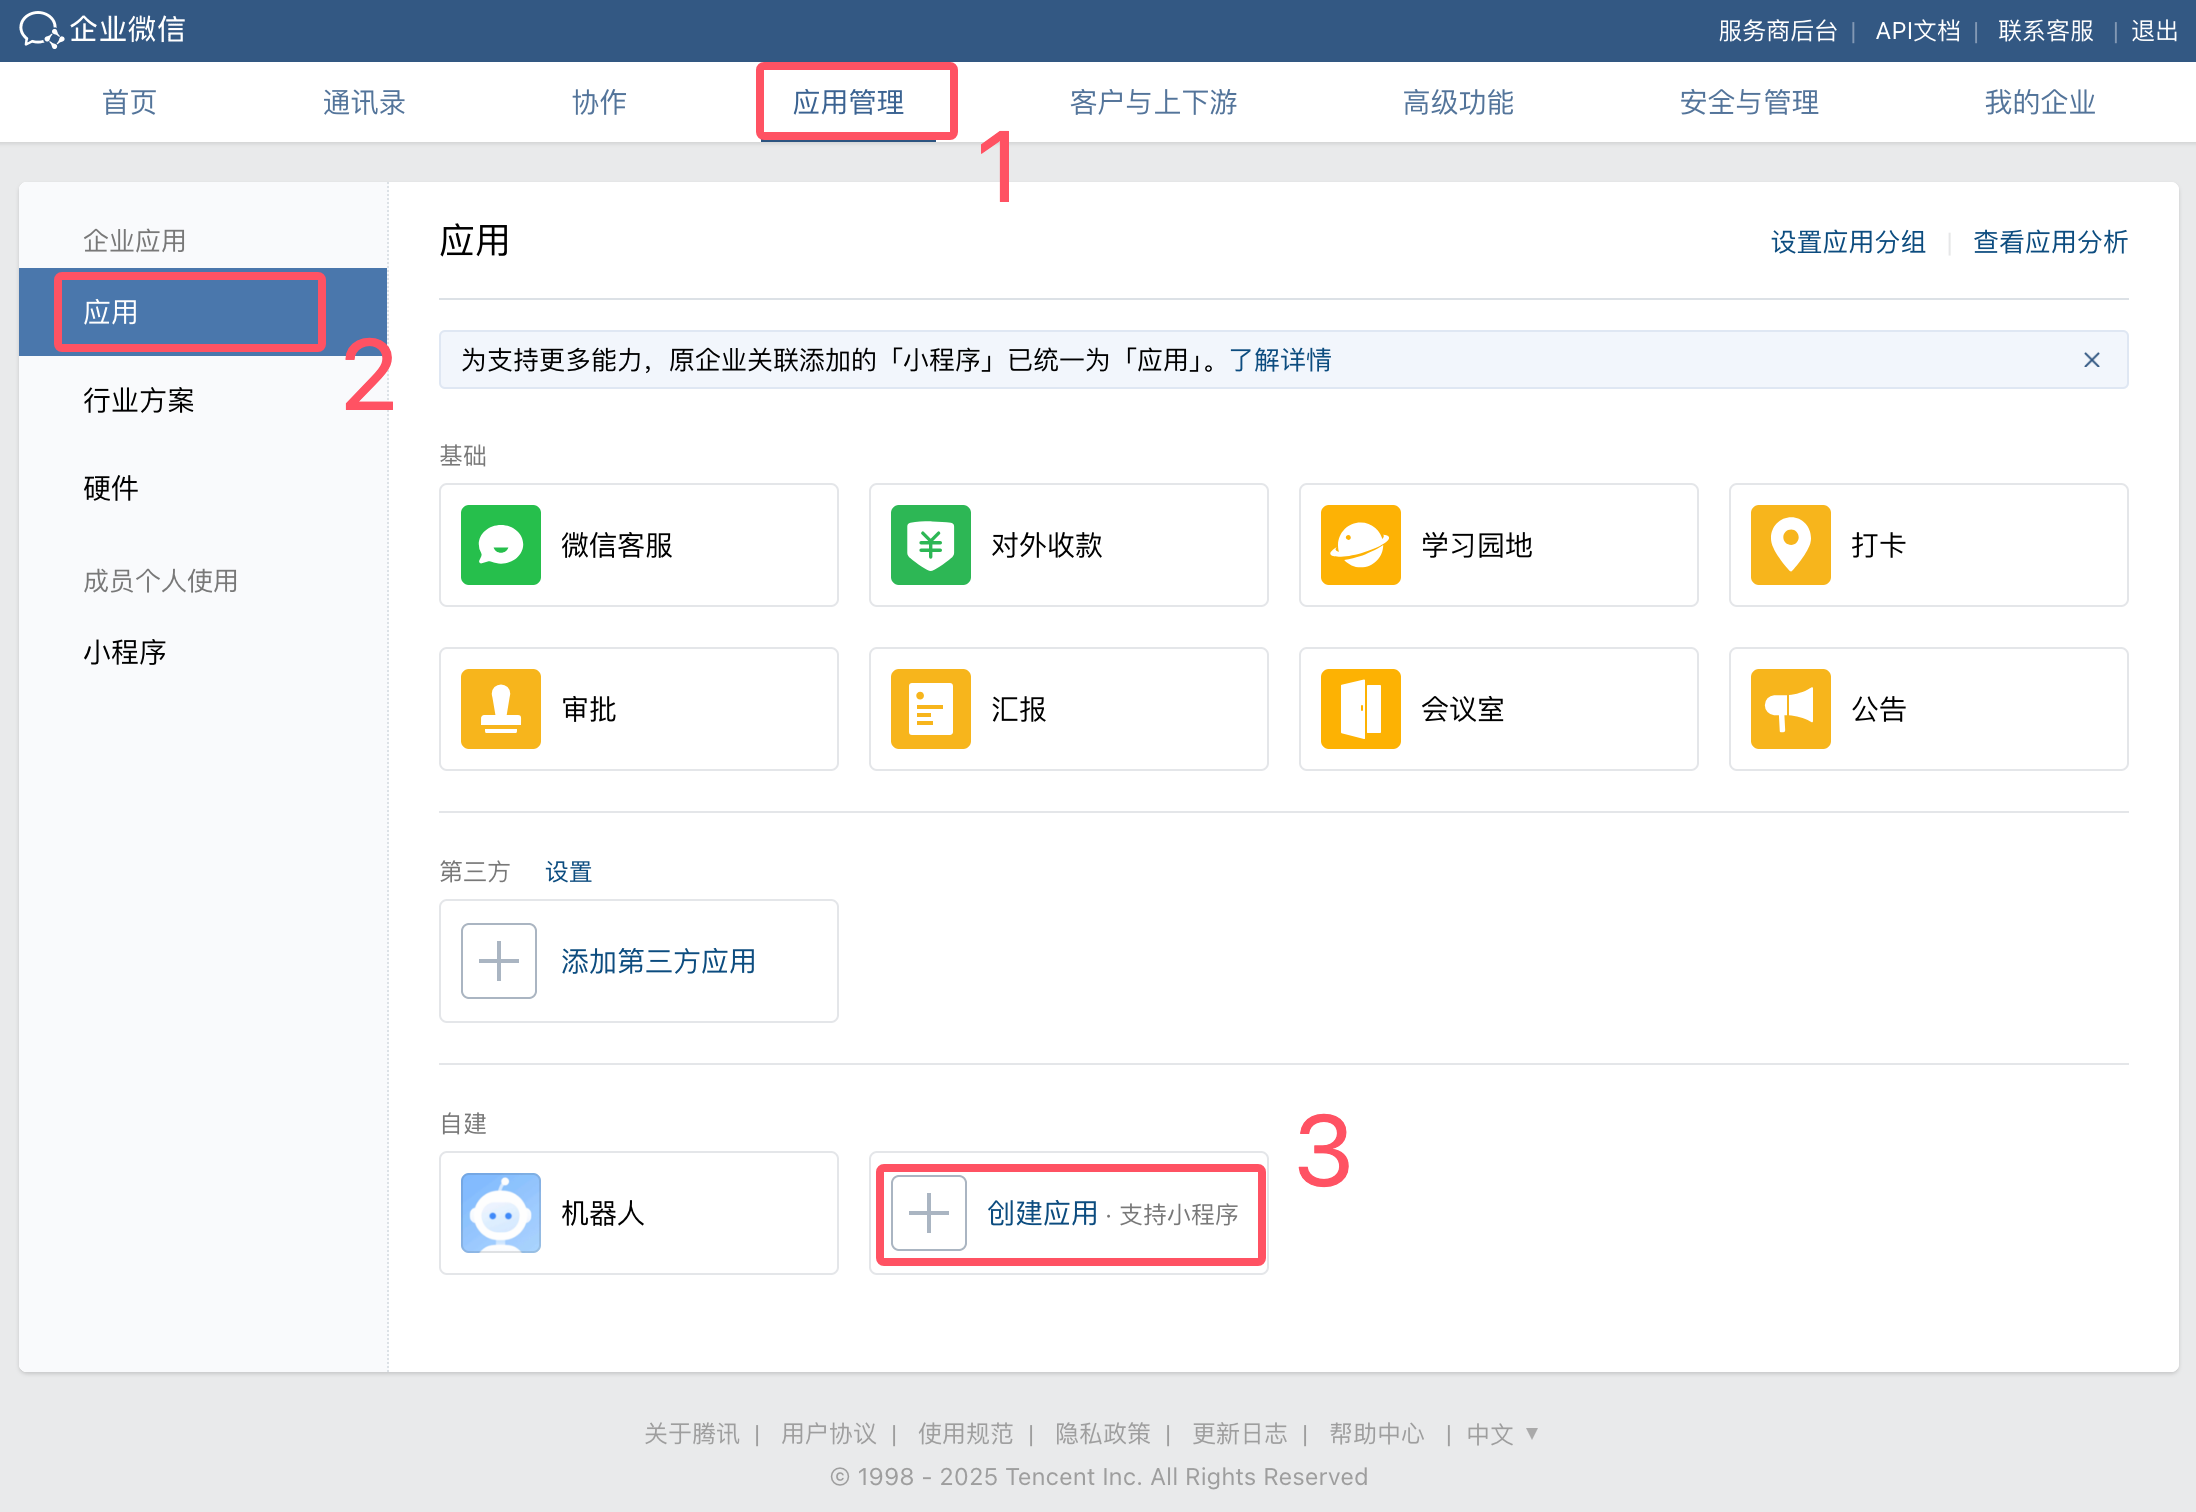
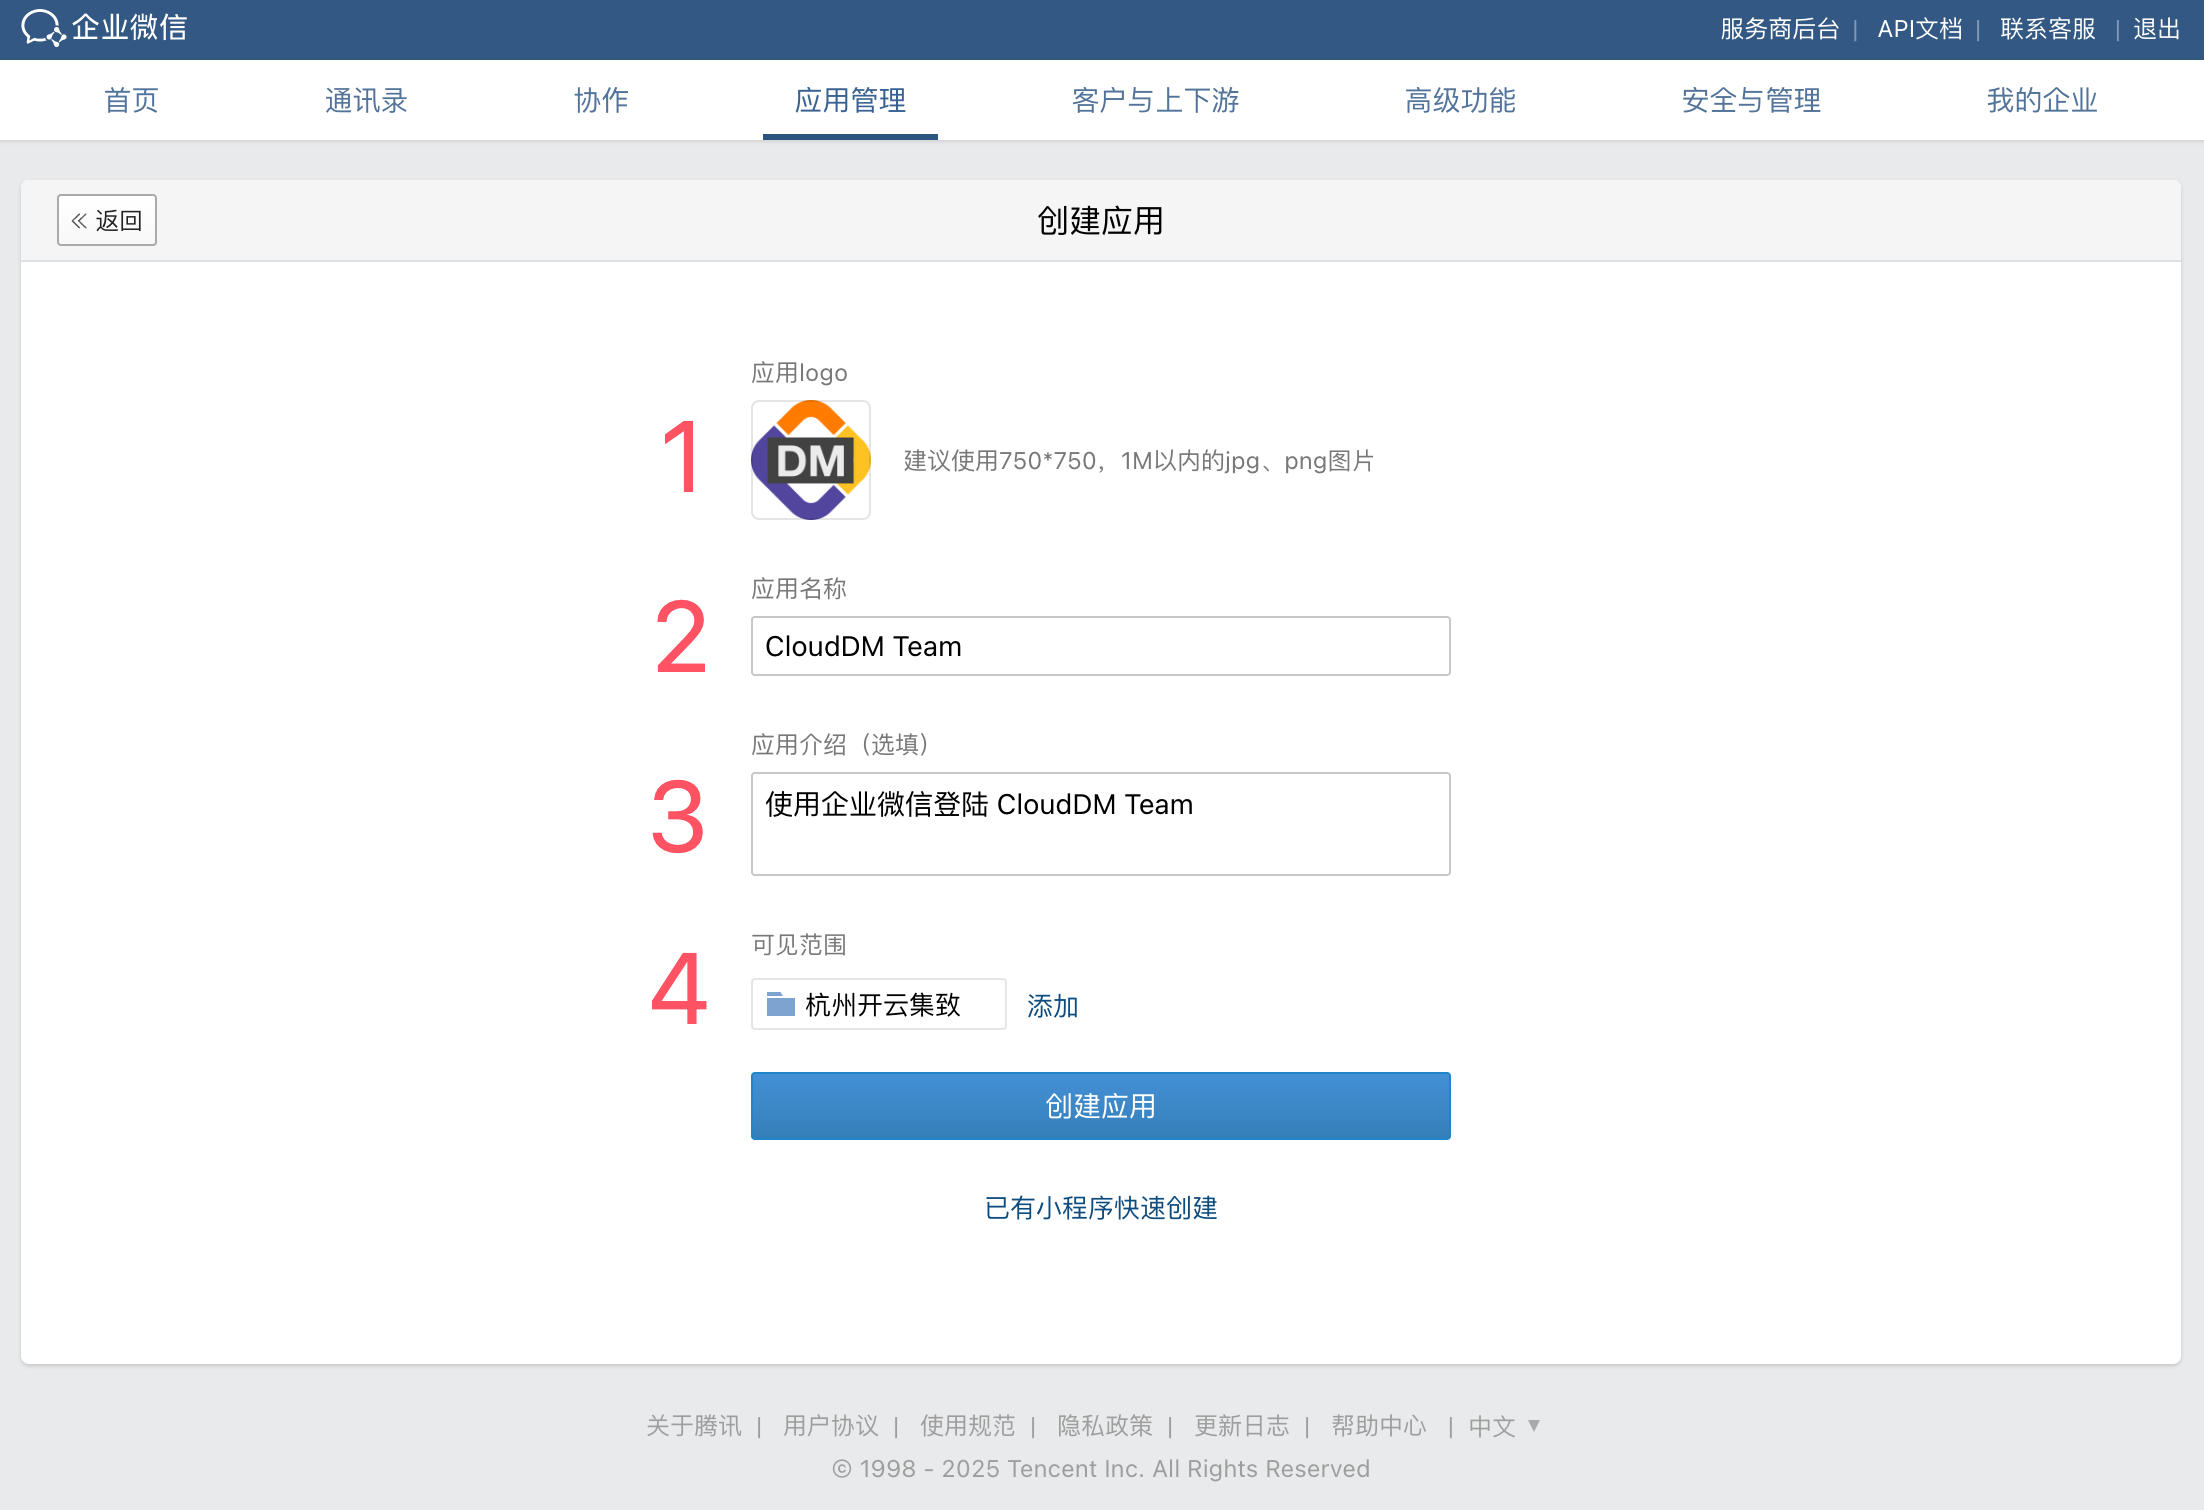
- Enter the app details. Set availability to the root department, which includes all employees, then click Create App. Icons are available under Resource downloads.
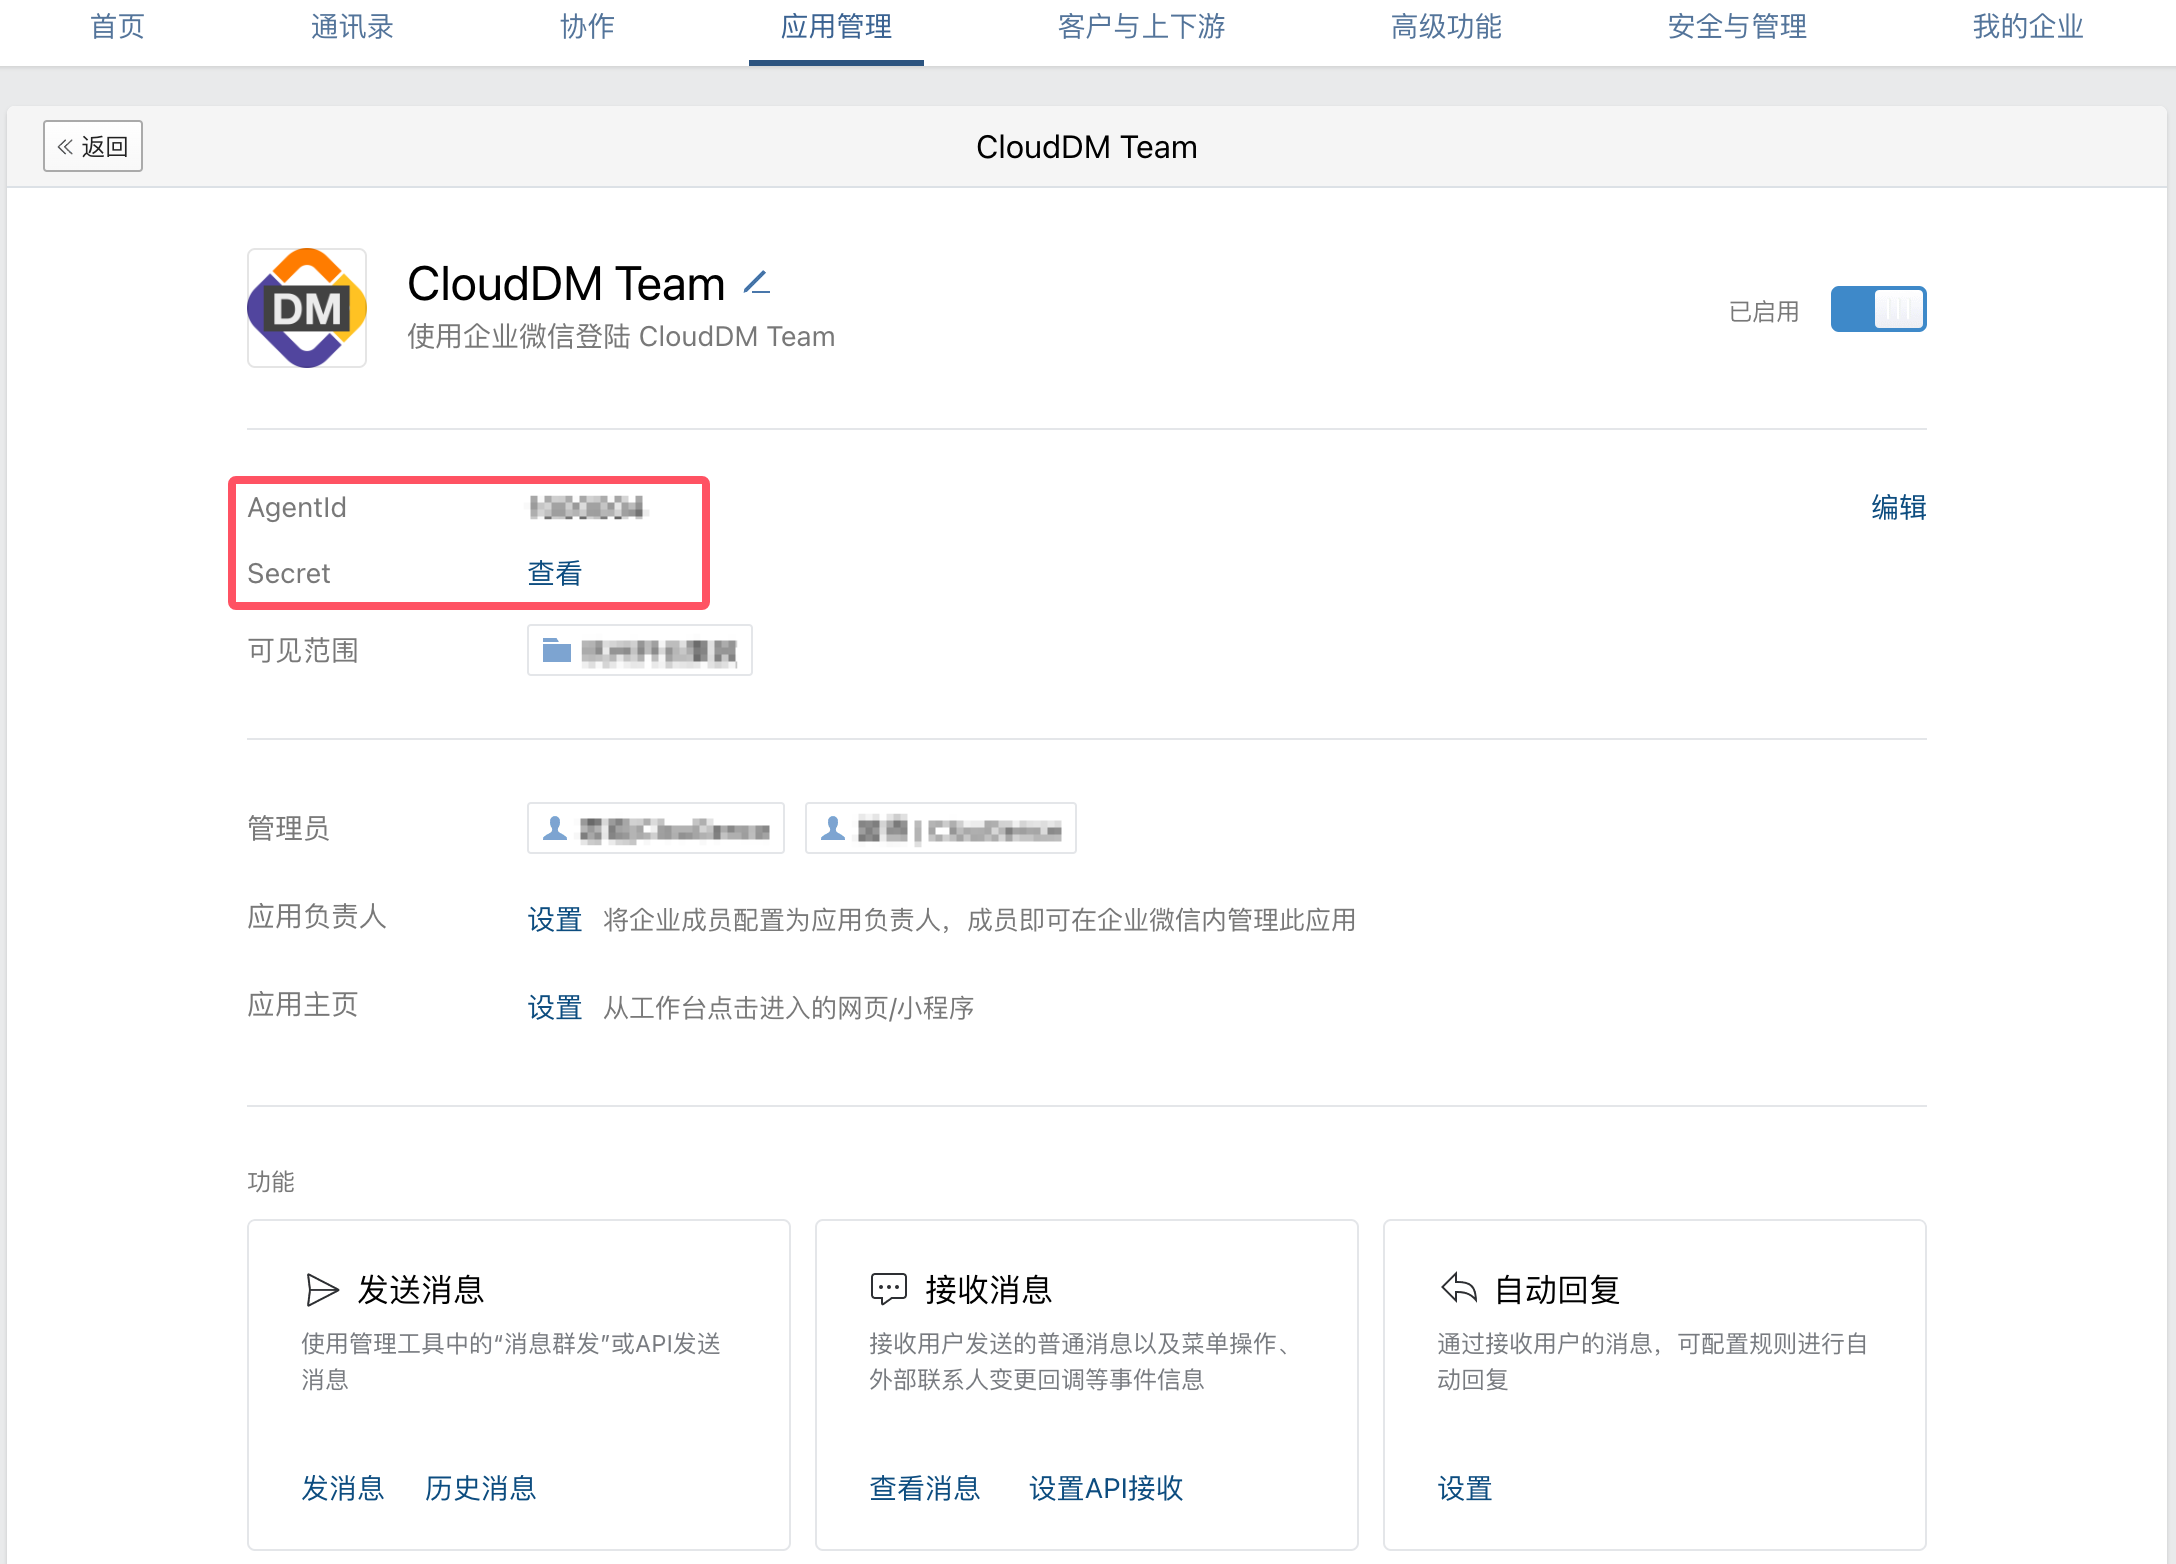
- Copy AgentId and Secret in App Details.
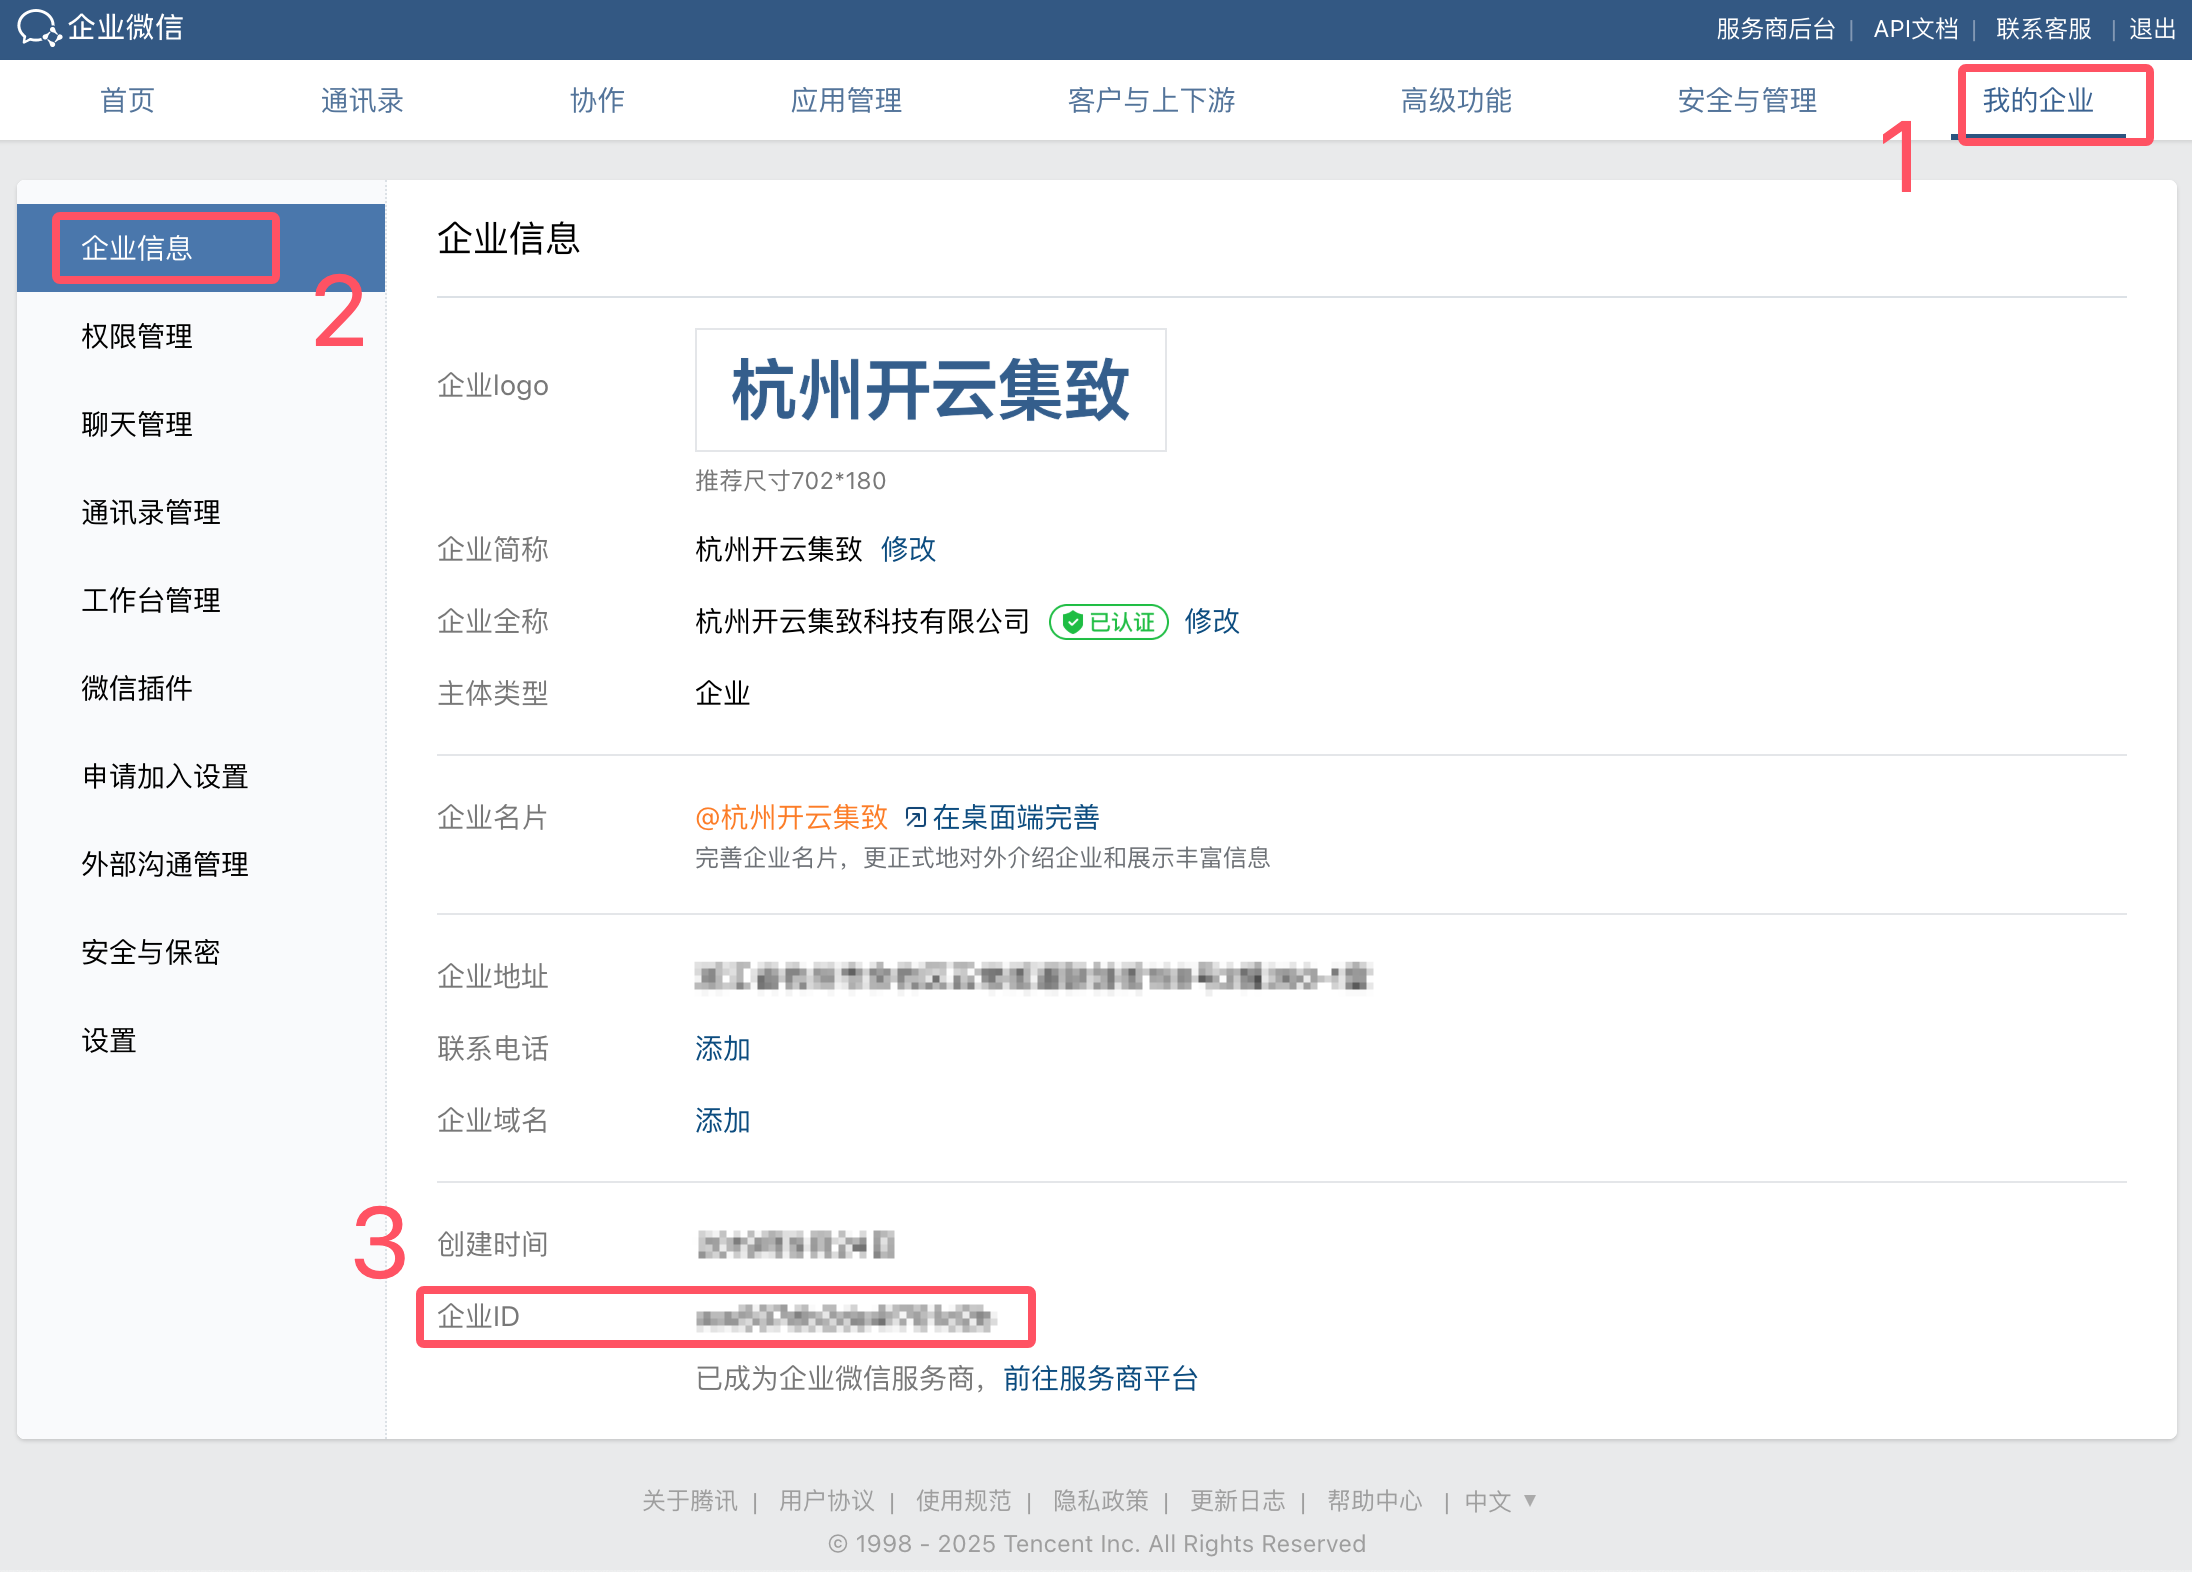
- Copy CorpId at the bottom of My Company.
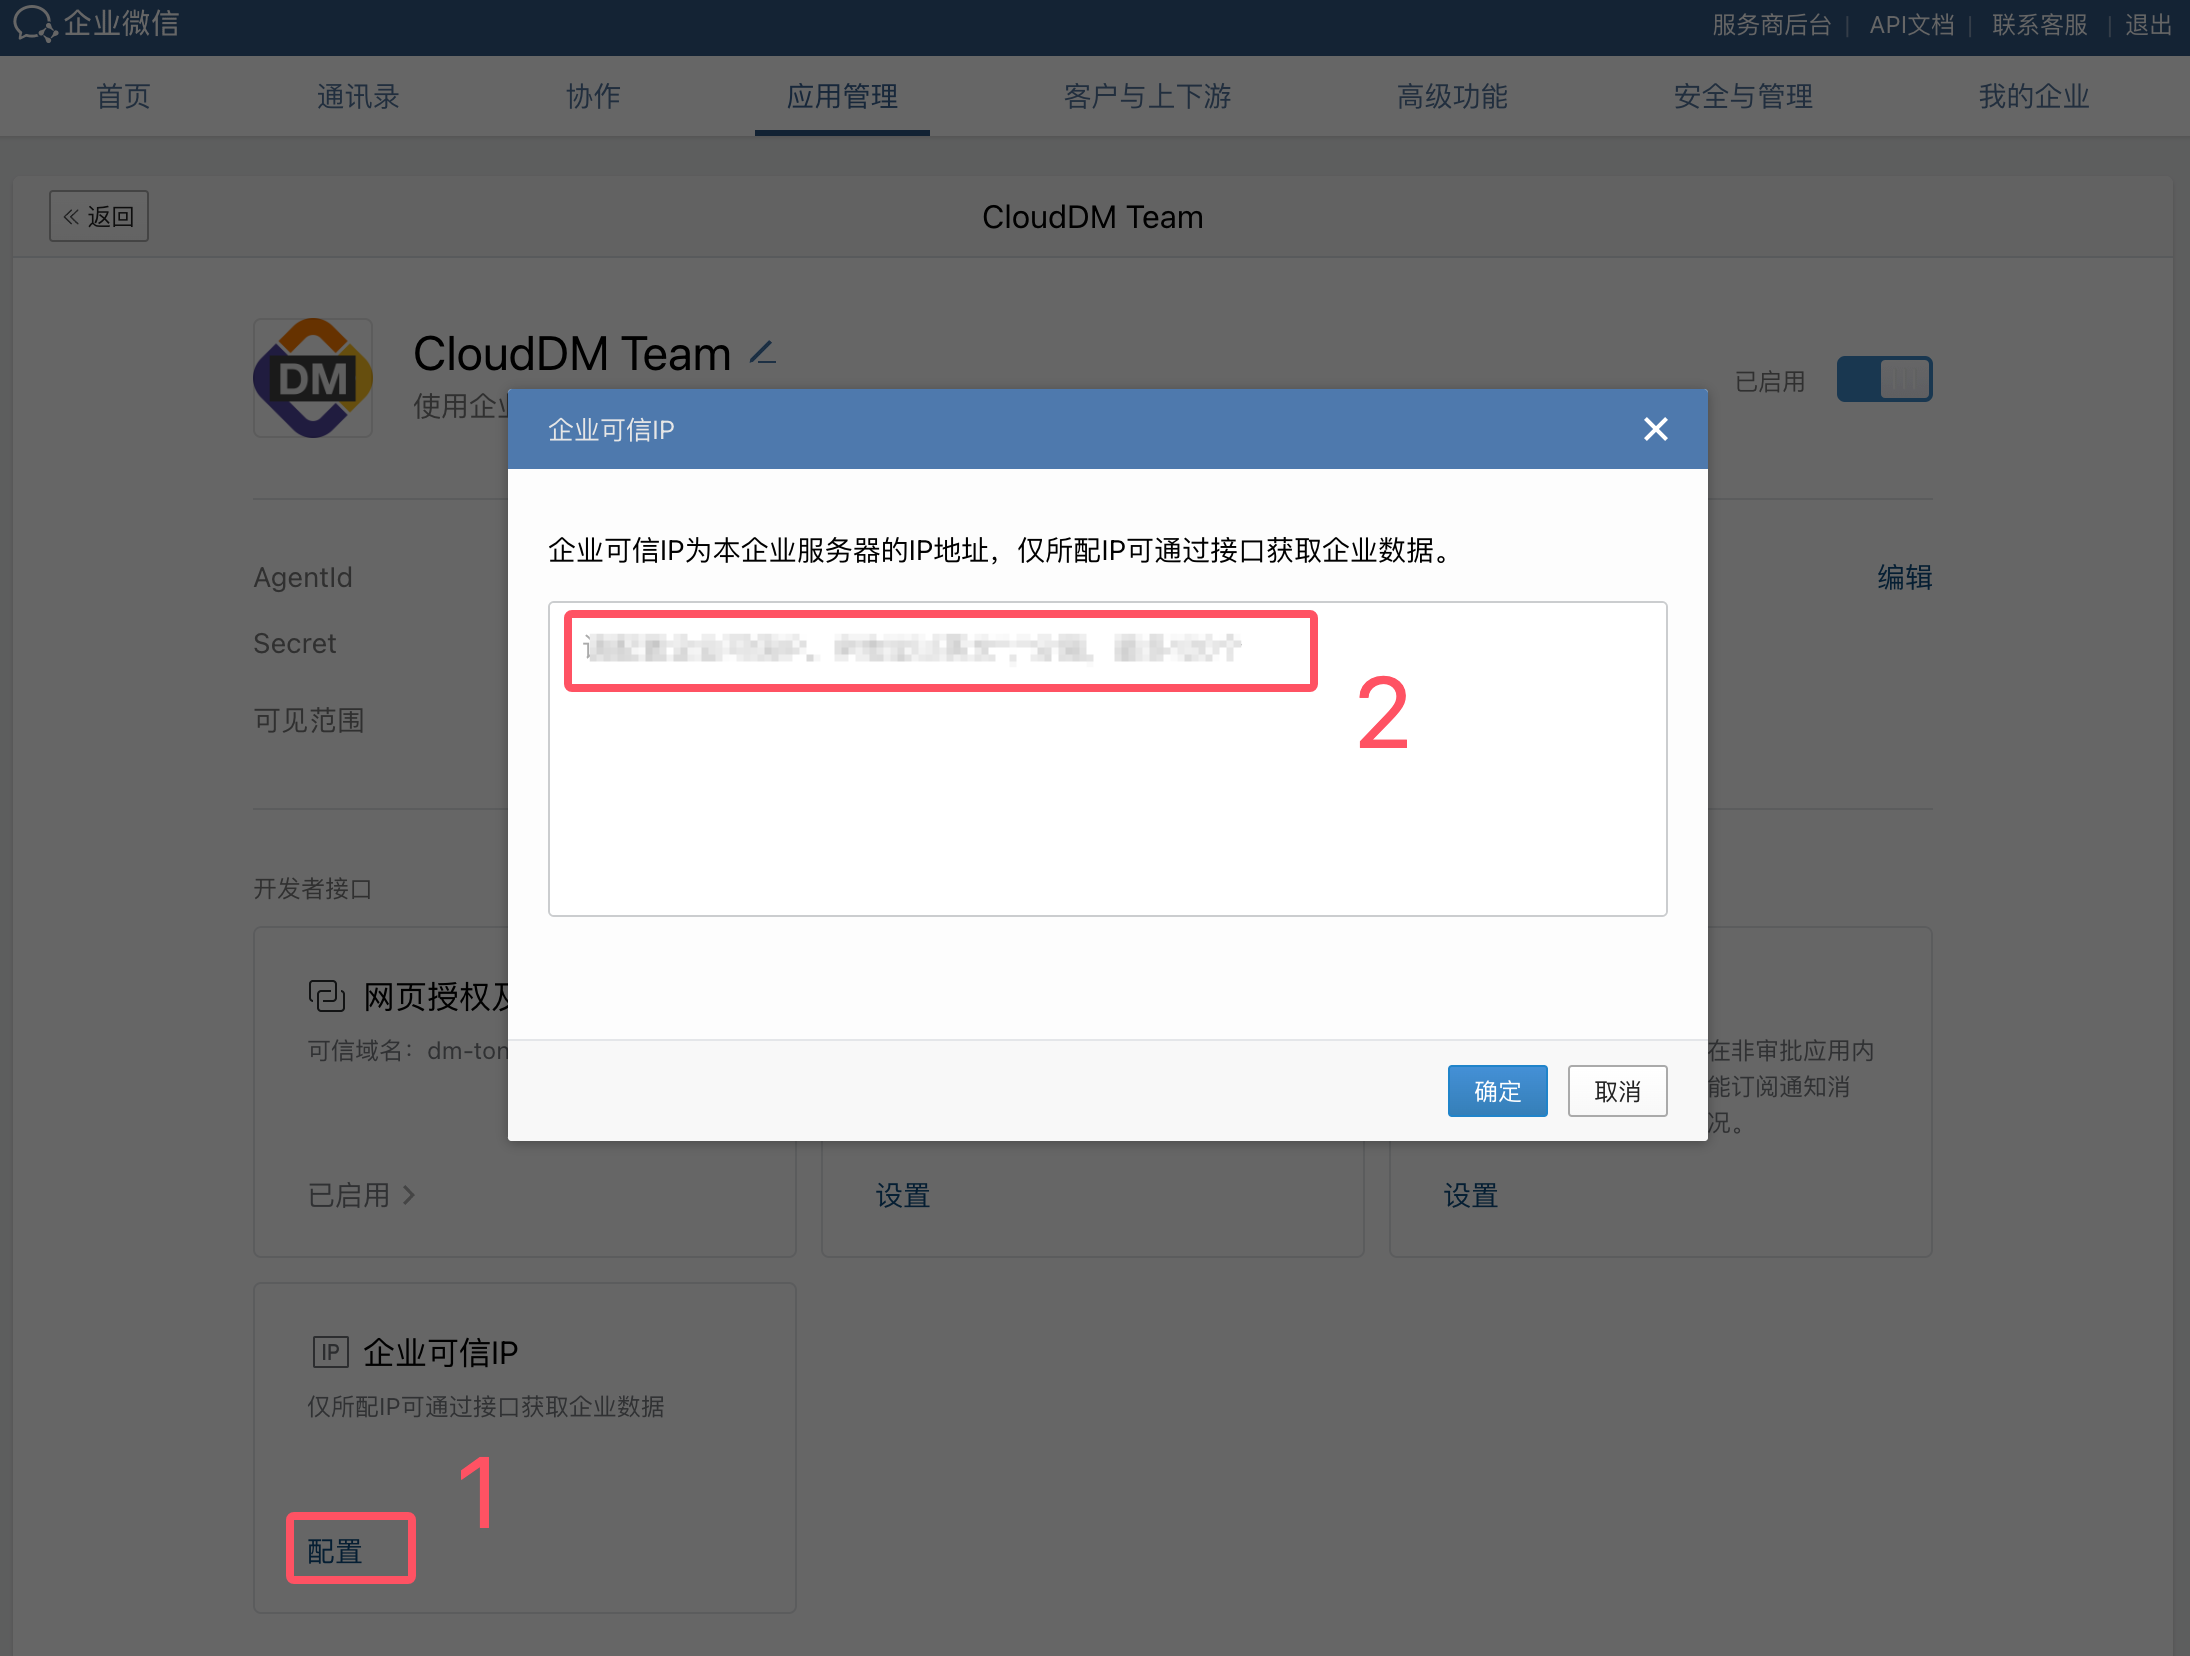
- In App Details > Trusted Company IPs, add the CloudDM server's public outbound IP address.
Configure approval forms
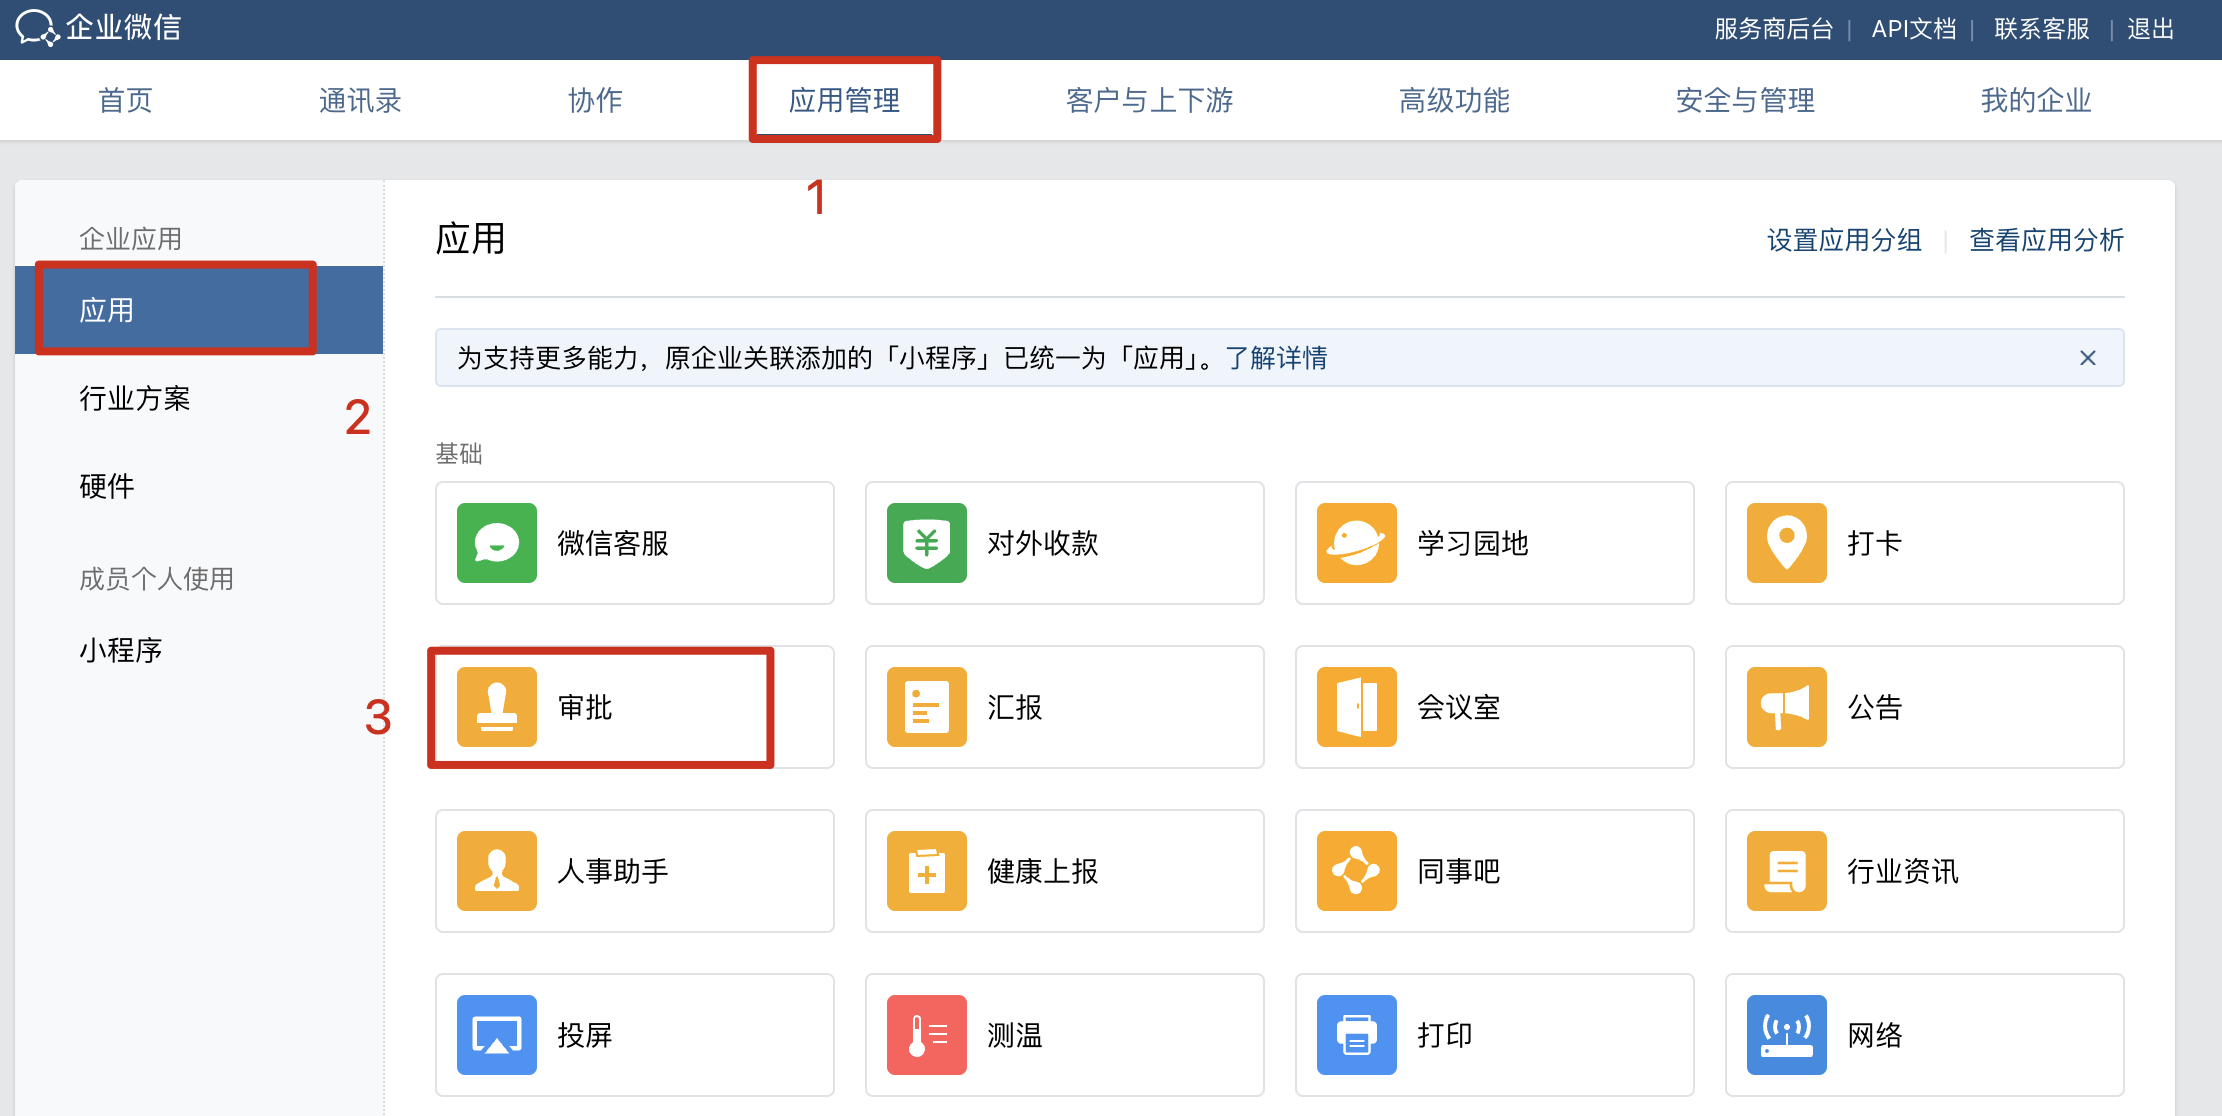
- In the WeCom admin console, open App Management > Approvals.
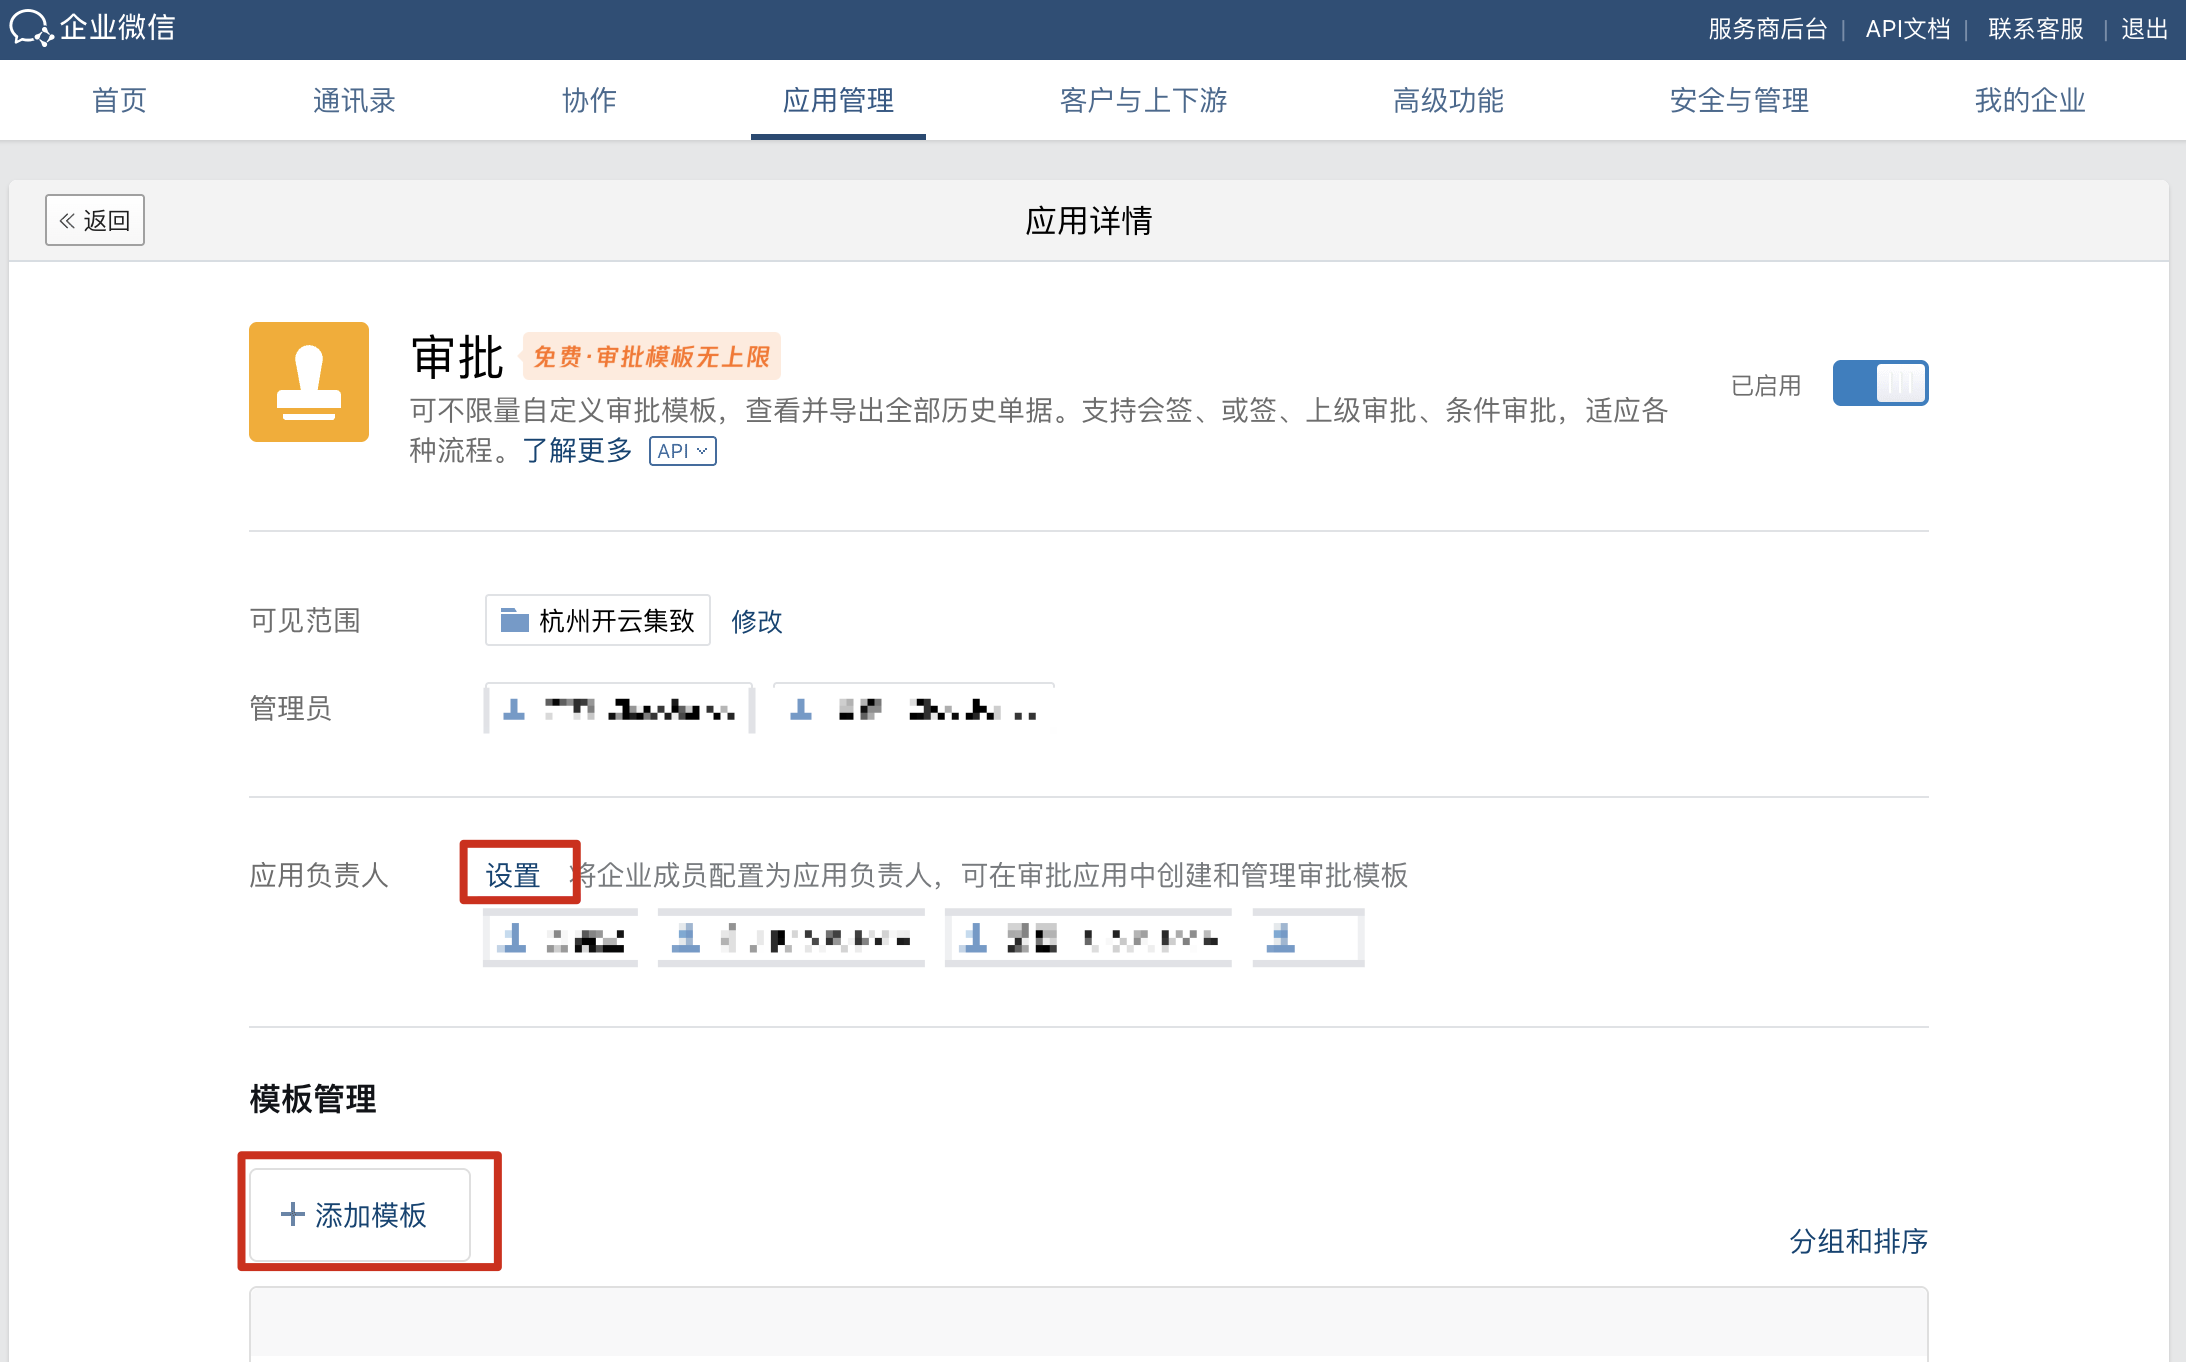
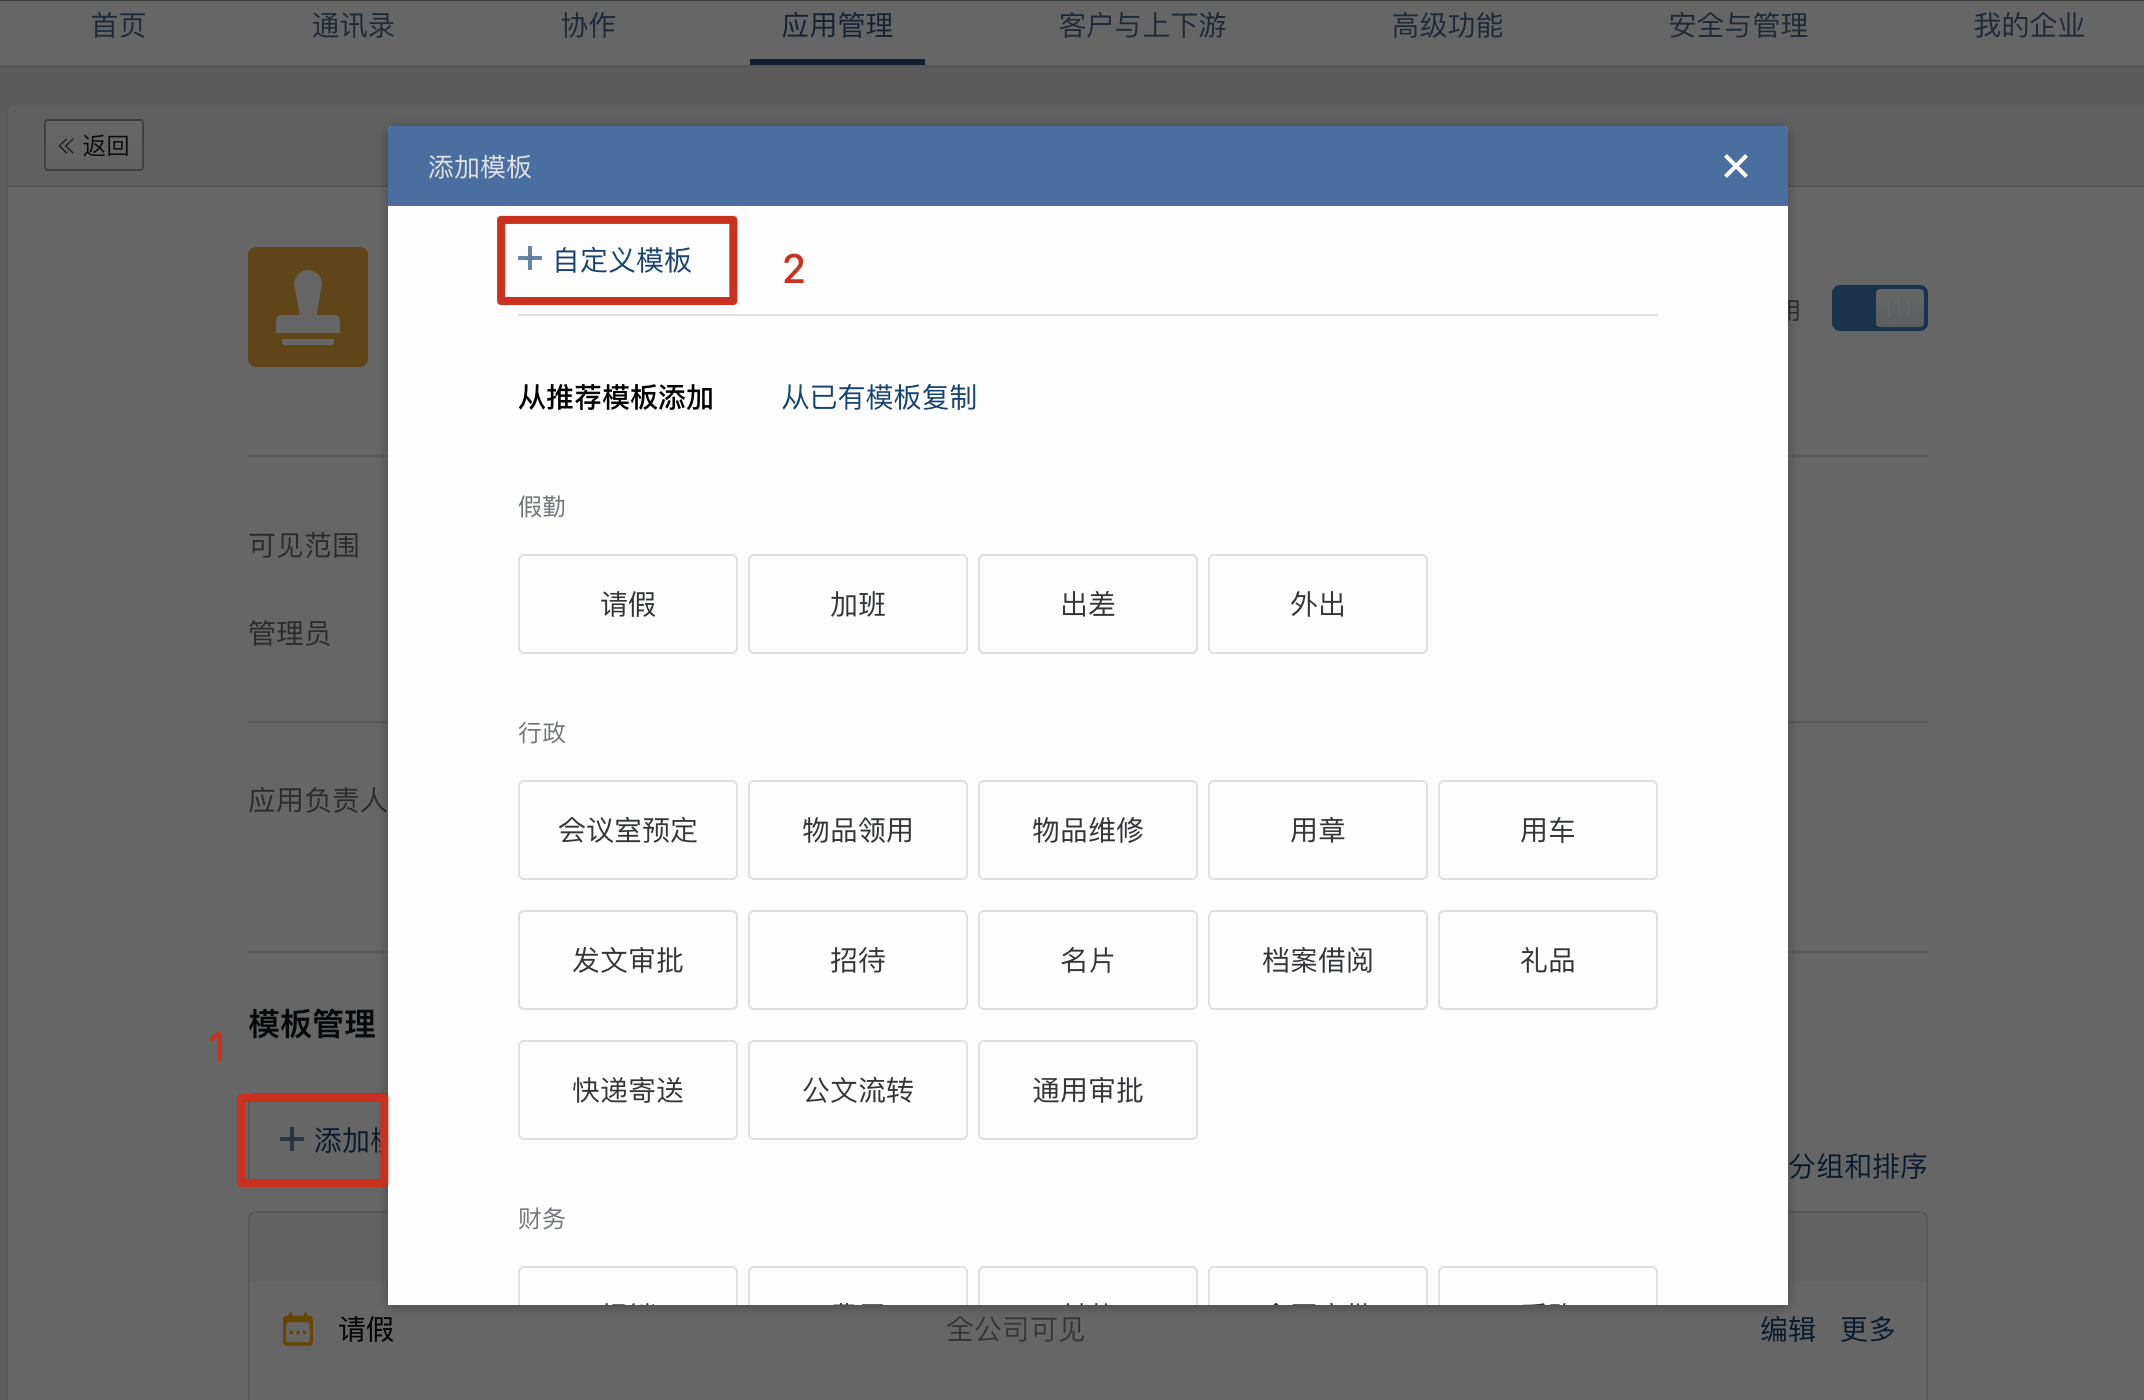
- Set the app owner if prompted, then open Template Management > Add Template and choose Custom Template.
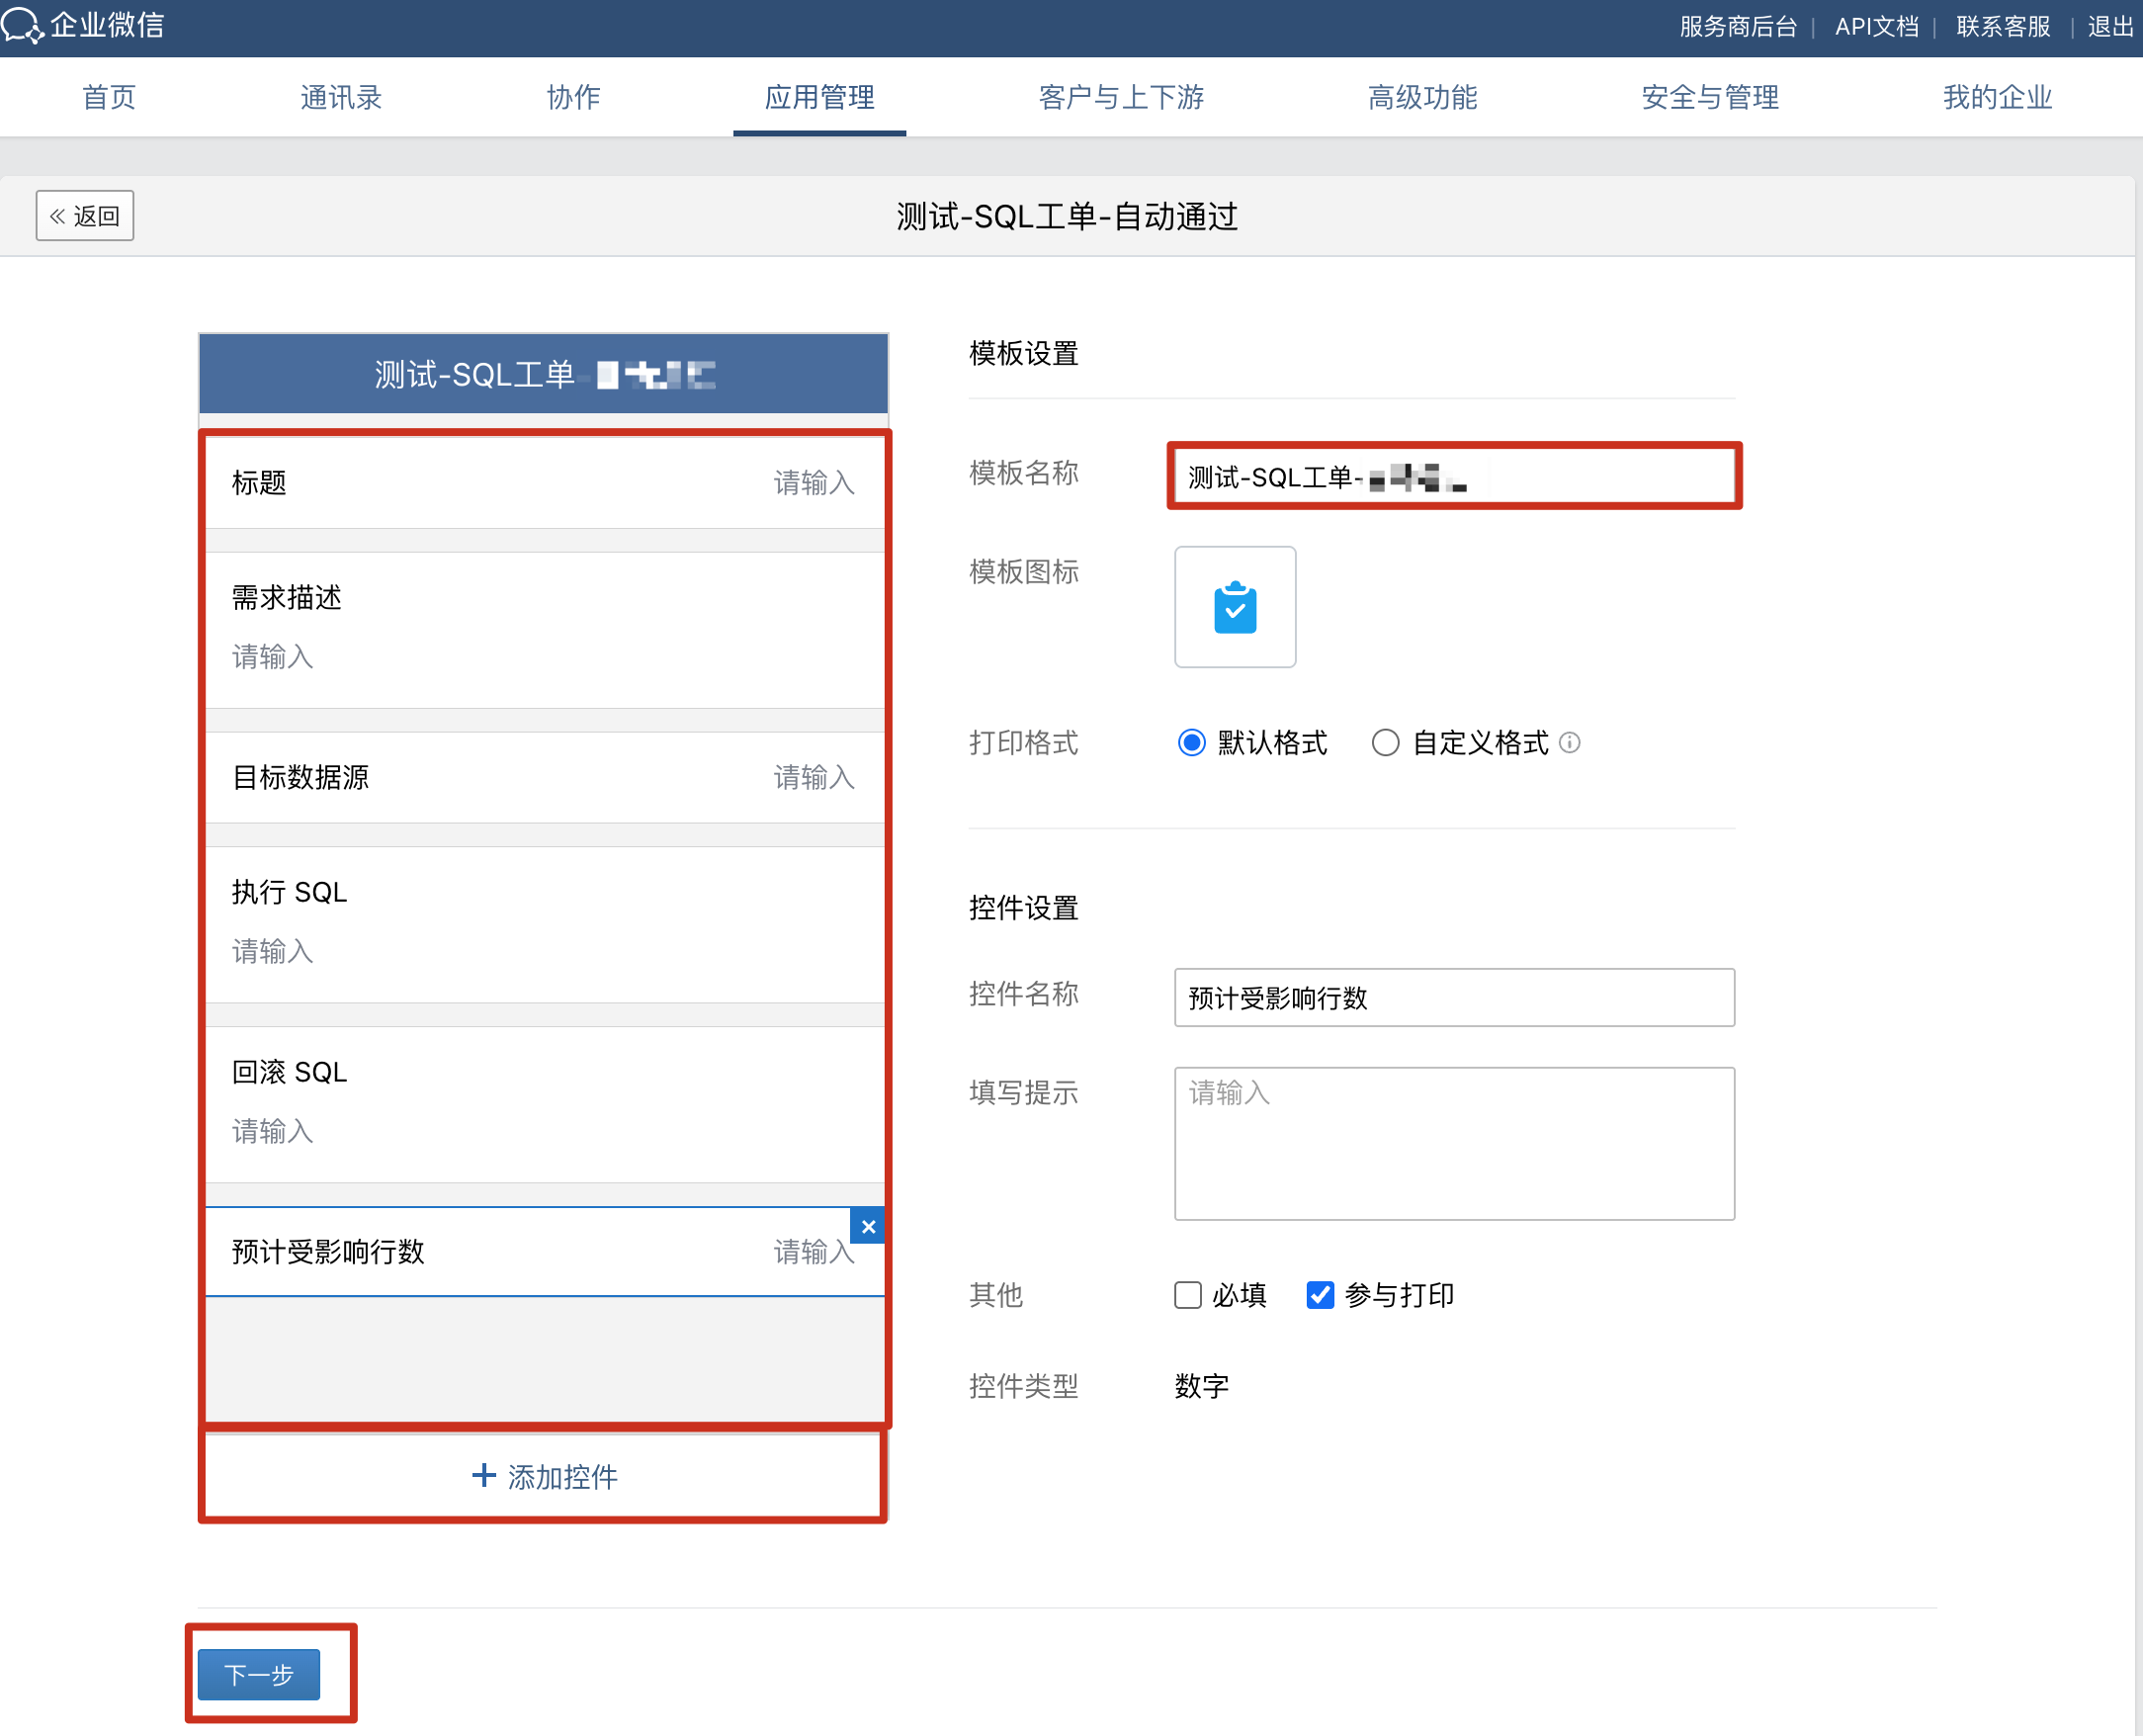
- Under Form Design, add the appropriate fields without marking them required.
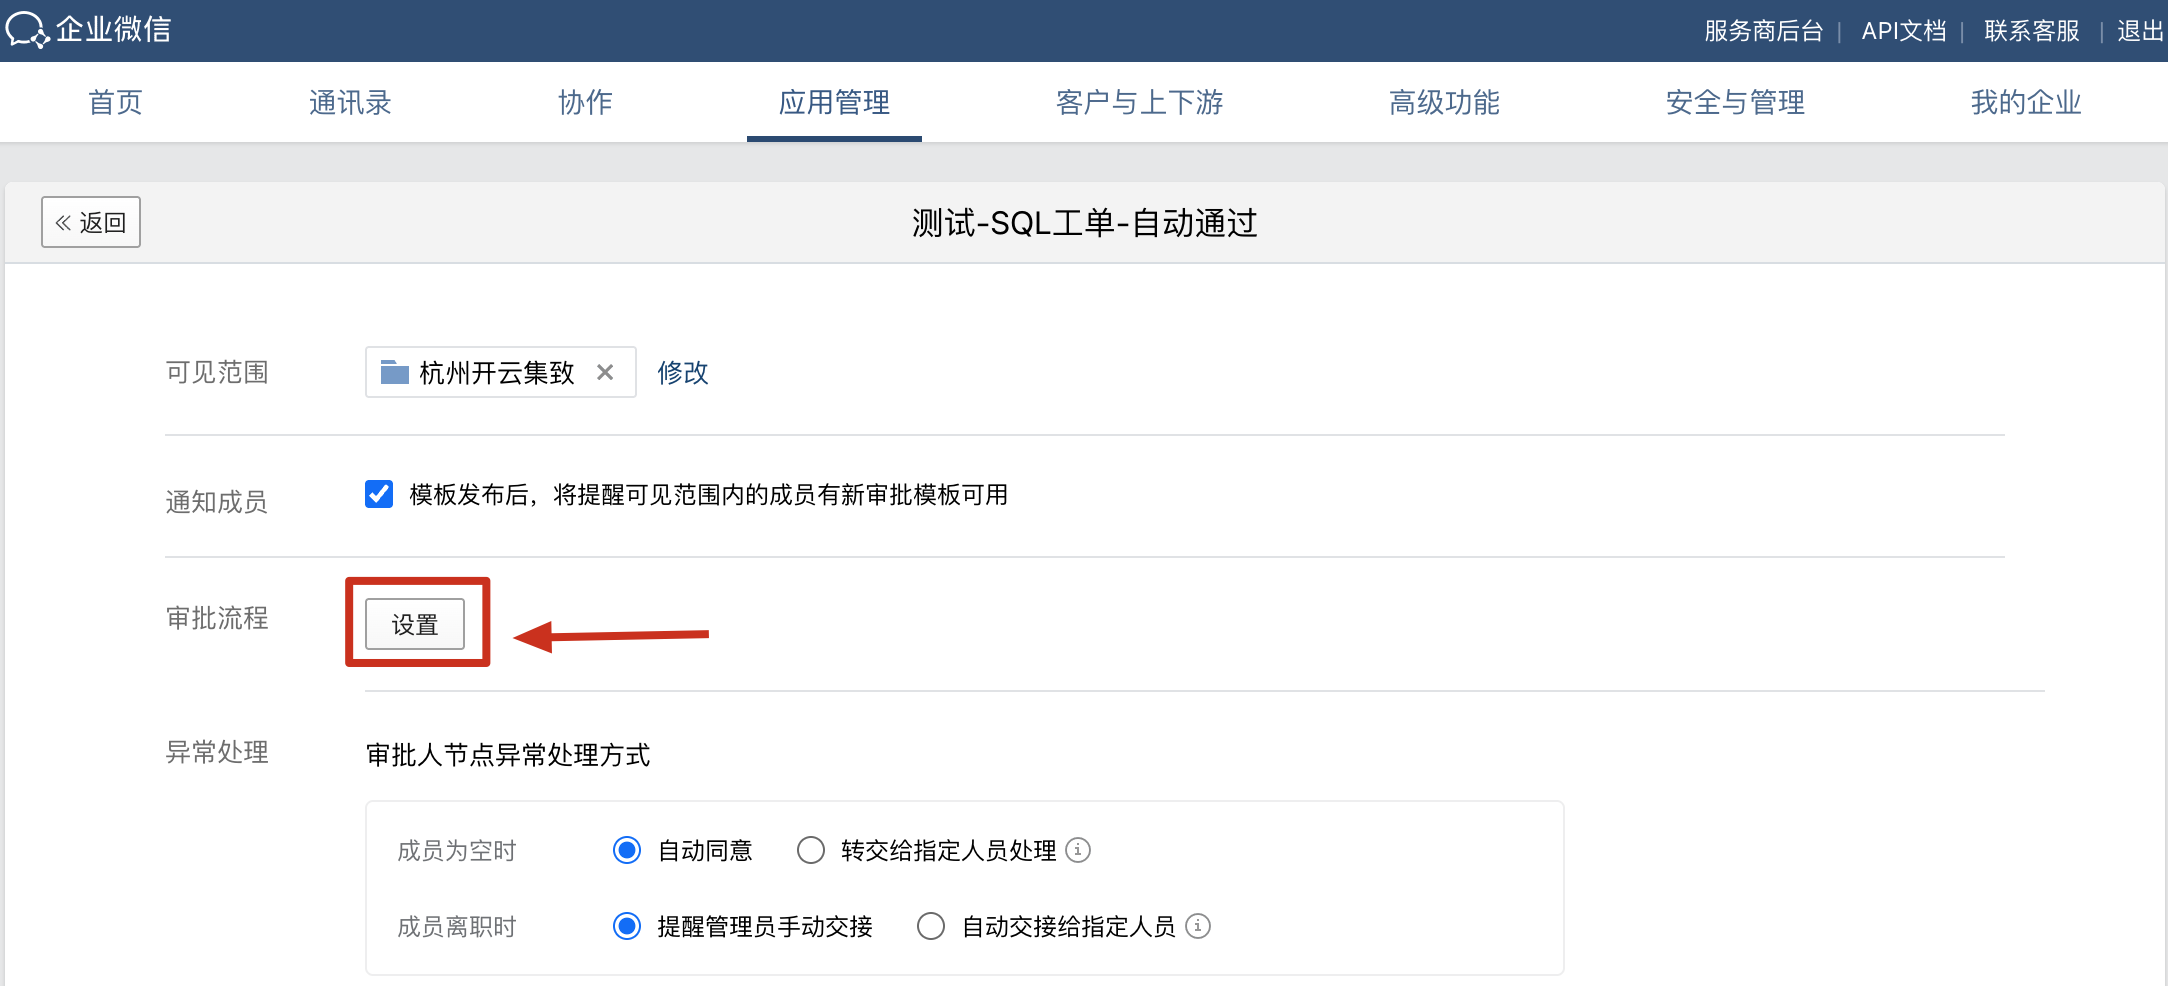
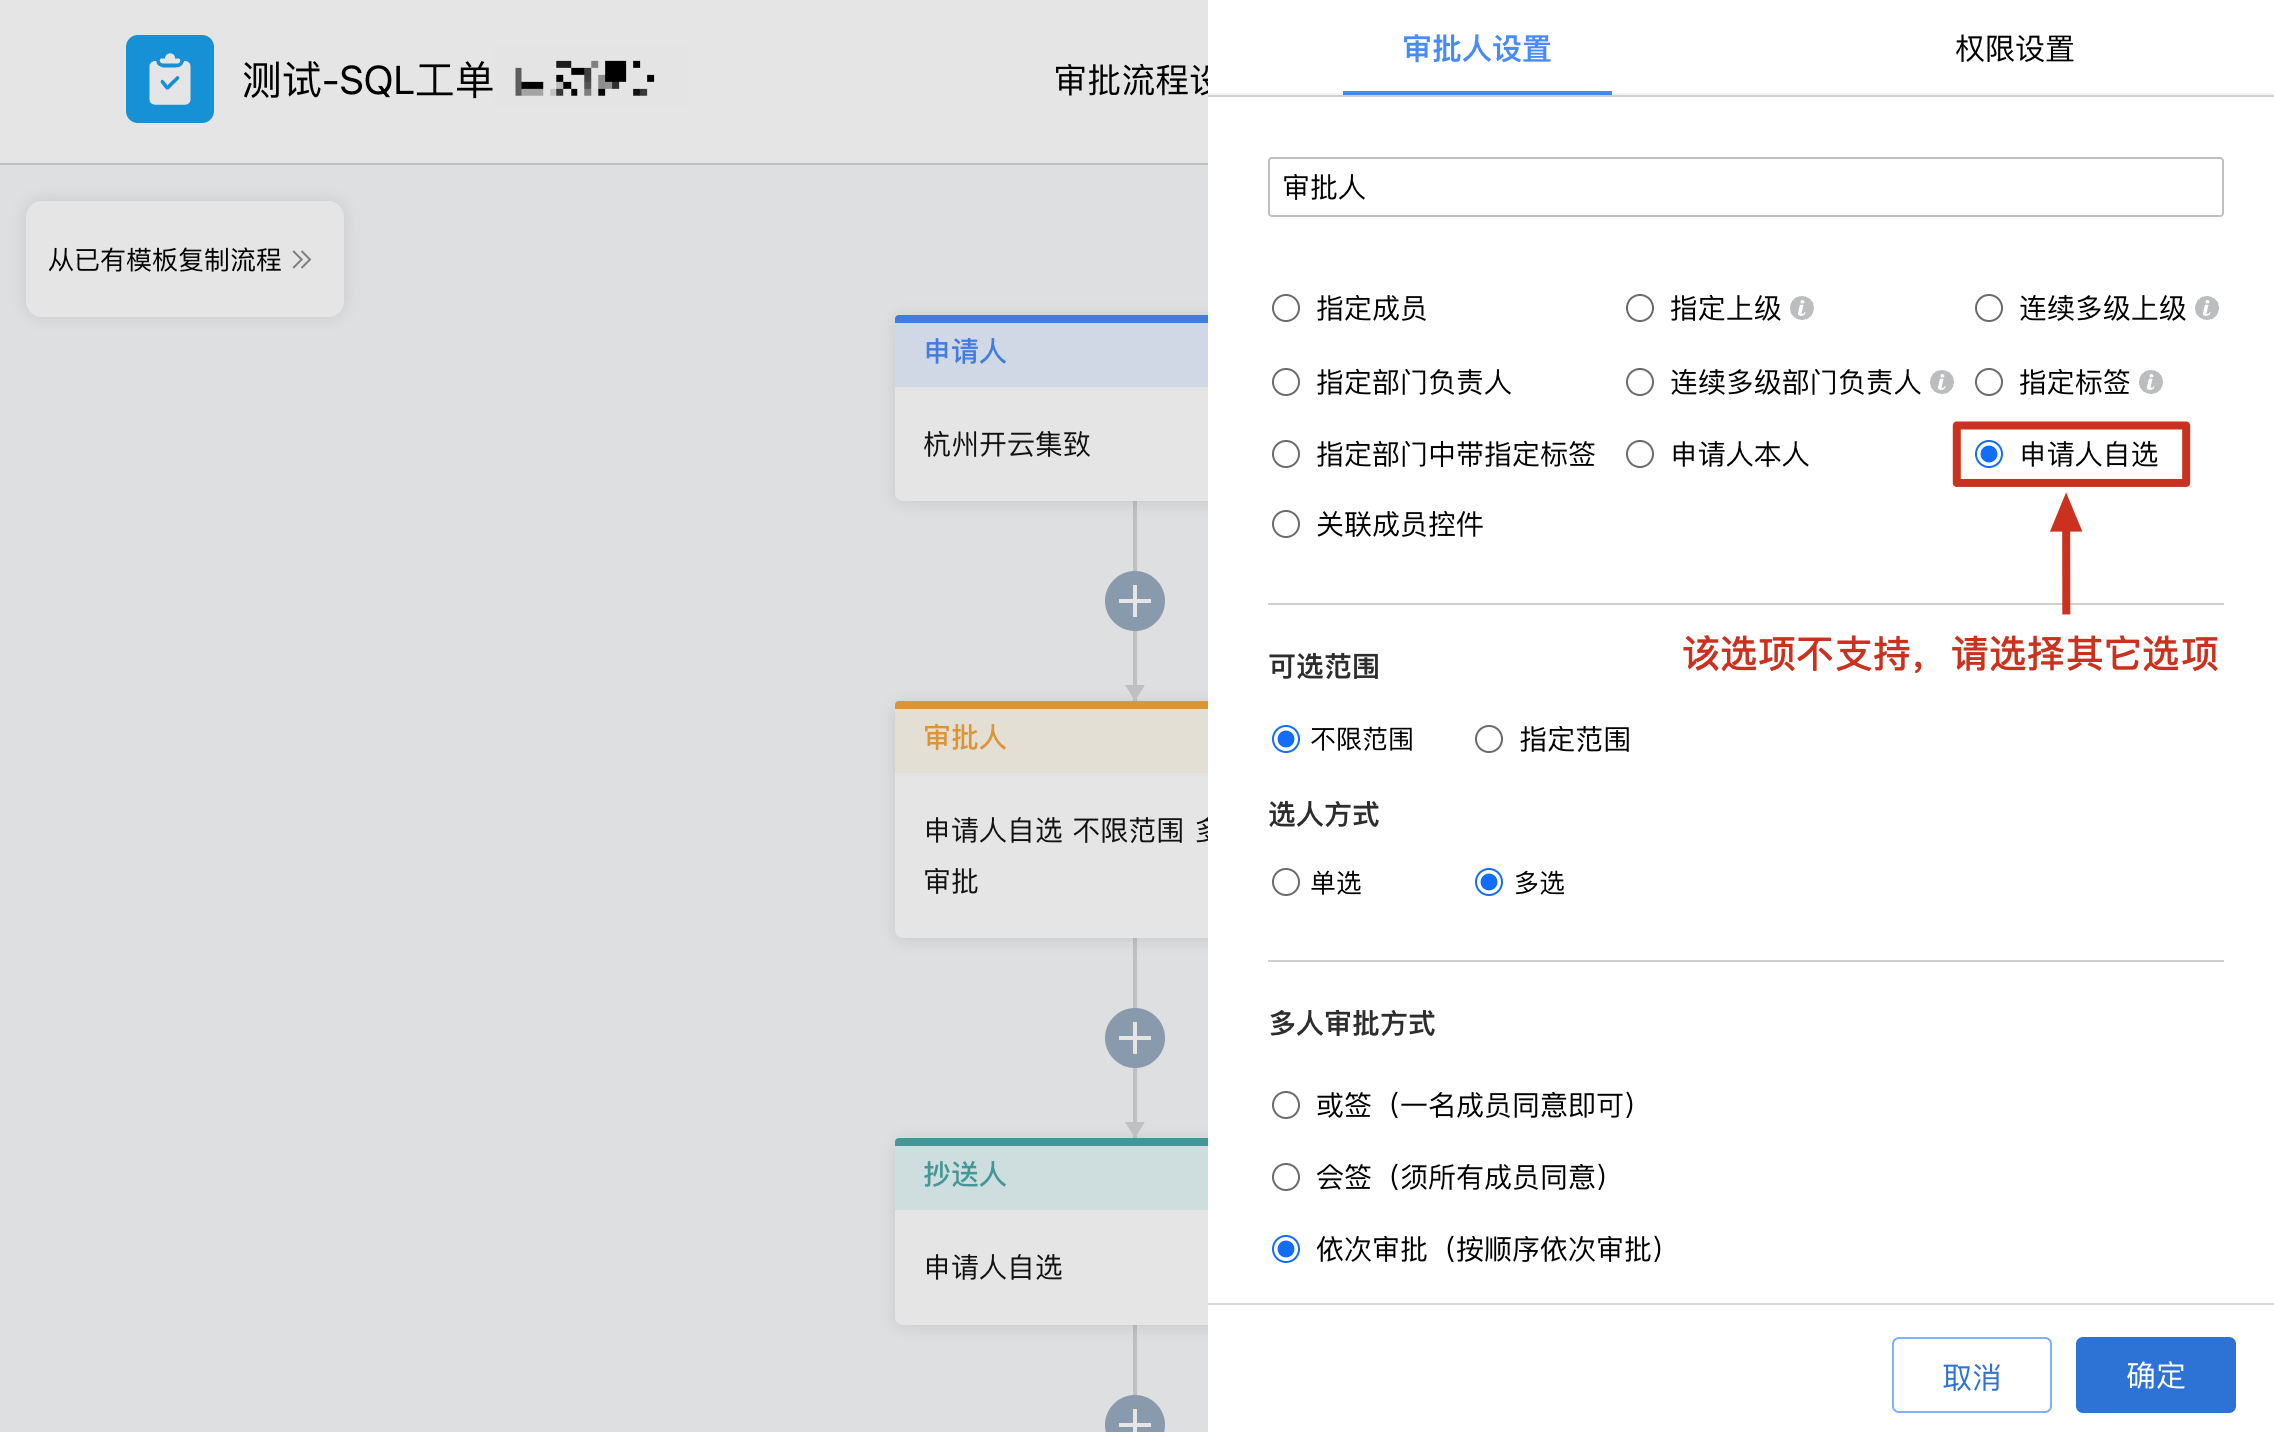
- Under Workflow Design, set the approvers and approval method for each step. CloudDM does not support letting the requester select approvers.
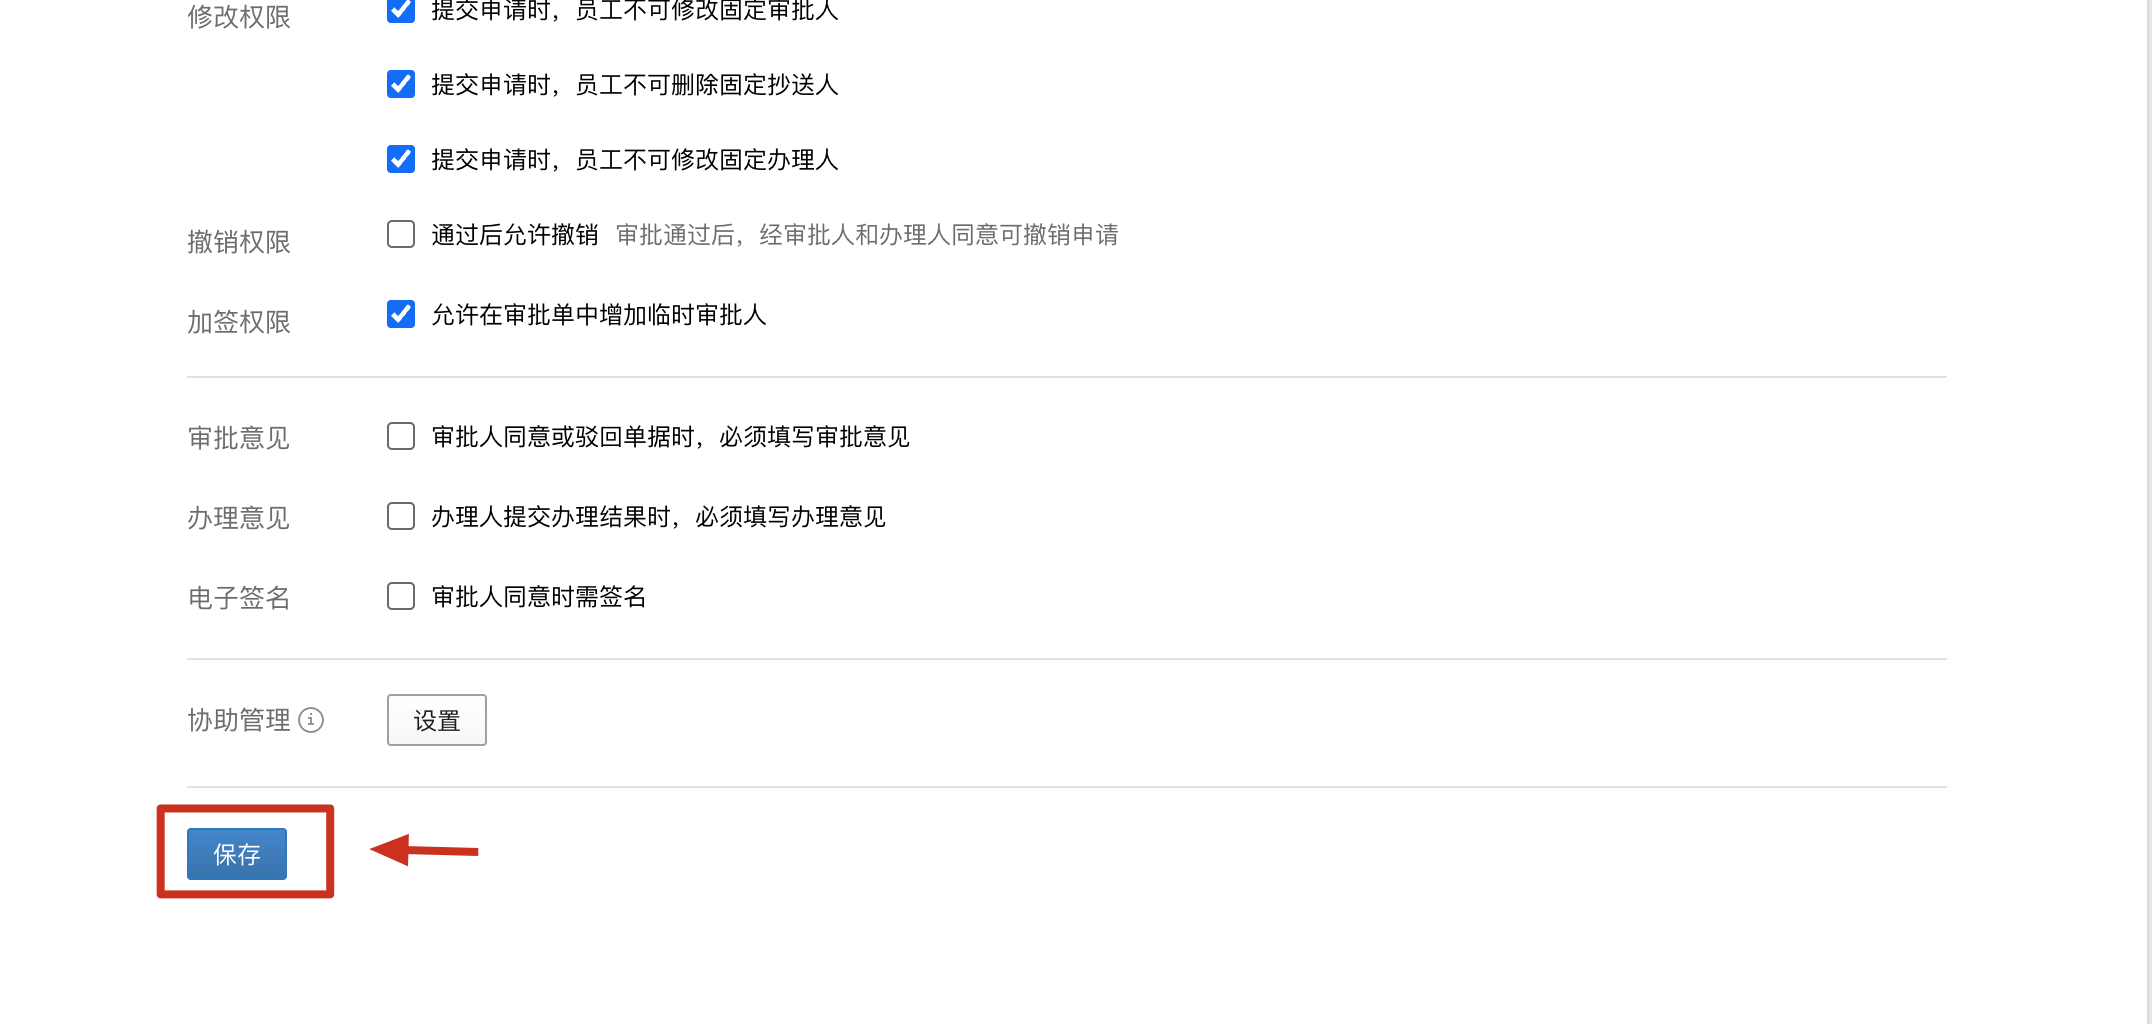
- Click Save at the bottom of the page.
SQL tickets
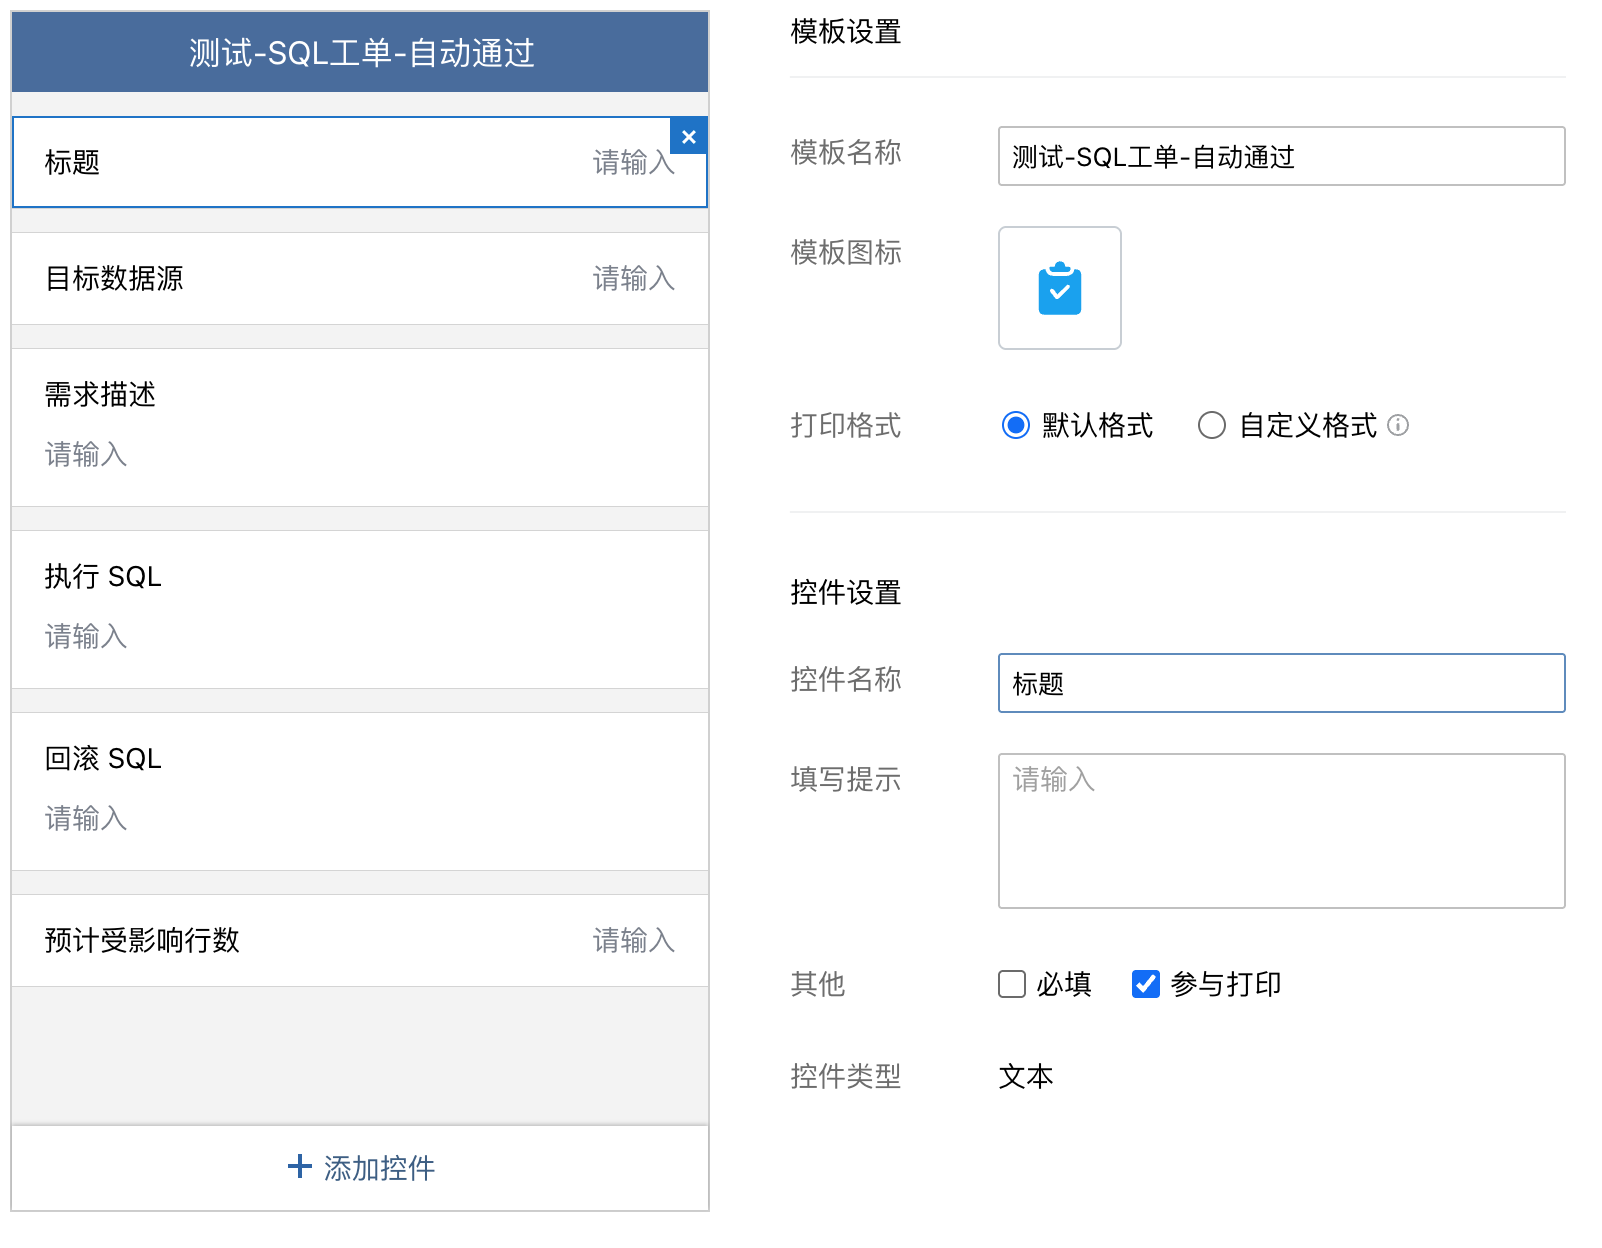
Follow the field types and order below exactly. Otherwise CloudDM may send incorrect data or be unable to submit the approval.
- Title (text)
- Target DataSource (text)
- Request description (multiline text)
- SQL to execute (multiline text)
- Rollback SQL (multiline text)
- Estimated affected rows (text)
info
The approval form truncates values that exceed its limits. View the full values in the CloudDM Console. The limit is 400 characters for single-line fields and 4,000 for multiline fields.
Permission tickets
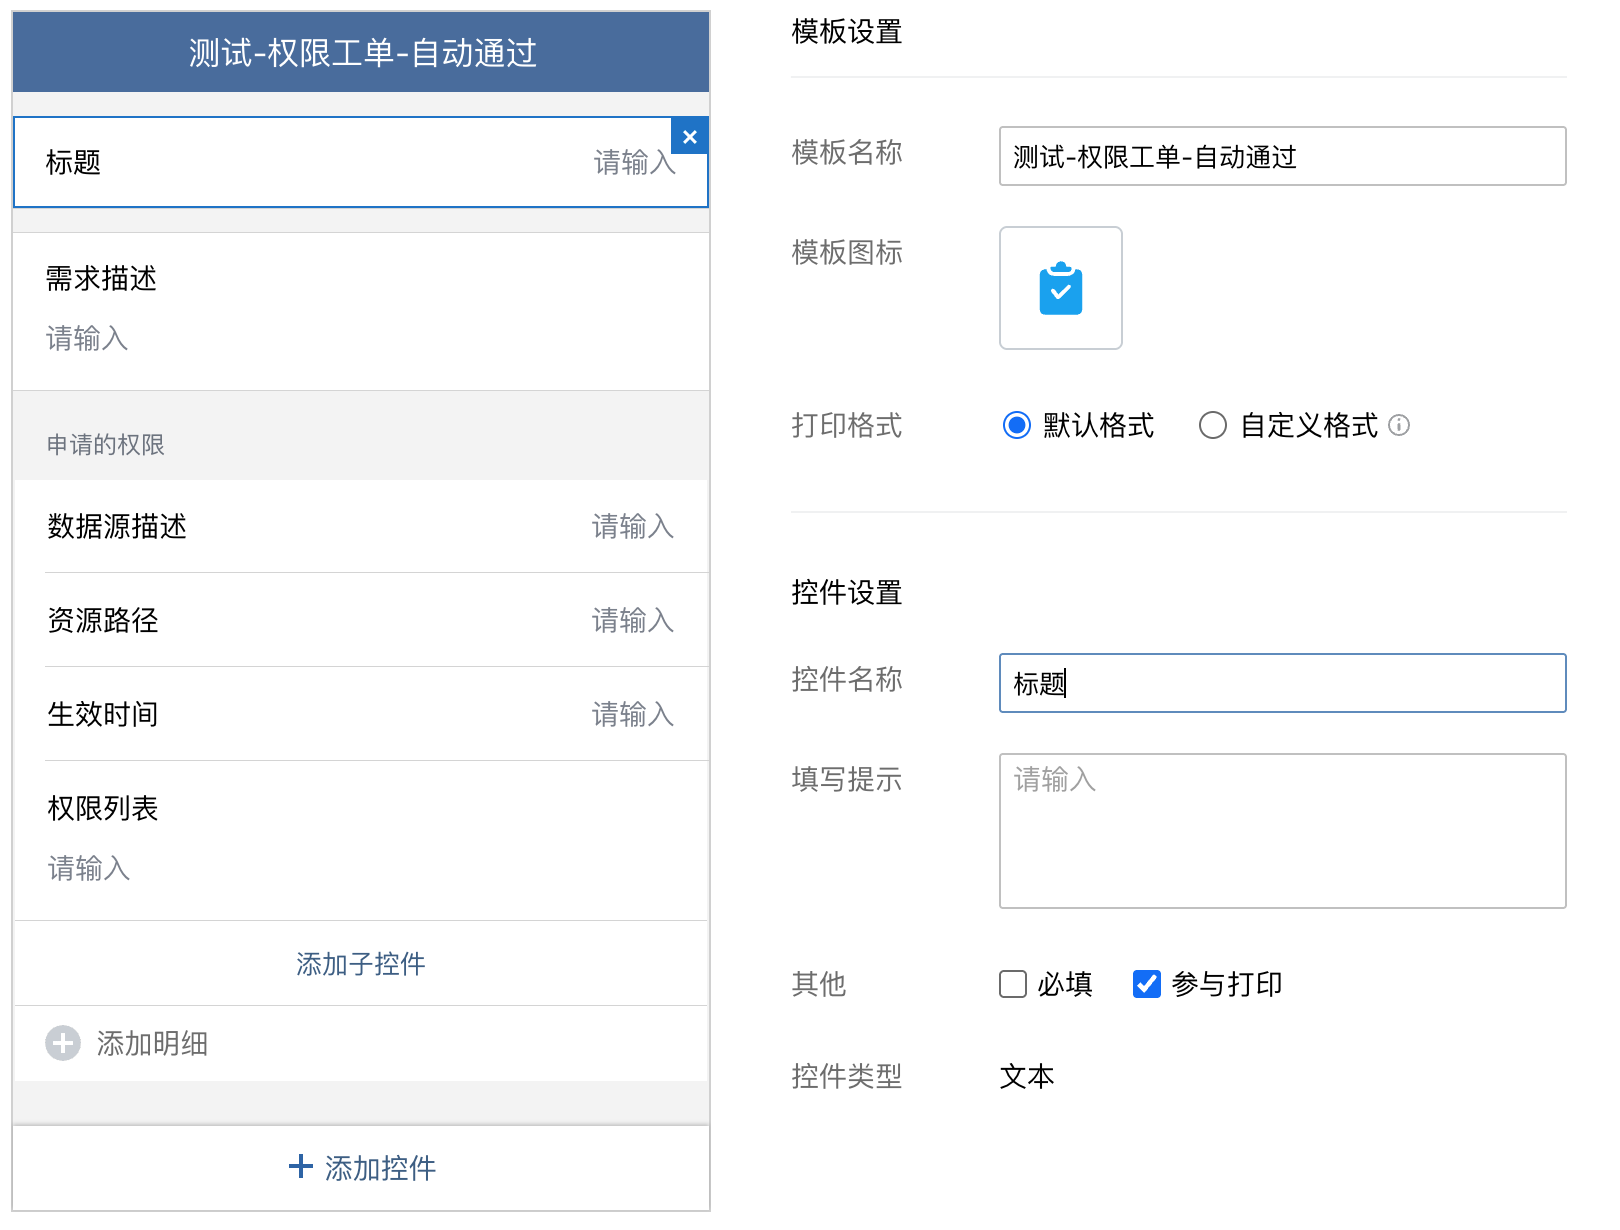
- Title (text)
- Request description (multiline text)
- Requested permissions (details, set the print format to combine entries on one line)
- DataSource description (text)
- Resource path (text)
- Effective time (text)
- Permission list (multiline text)
Change tickets
- Title (text)
- Request description (multiline text)
- Target DataSource (text)
- Change flow (text)
- Change (text)
- Branch (text)
- SQL to execute (multiline text)
Configure event delivery
- Enable the message channel.
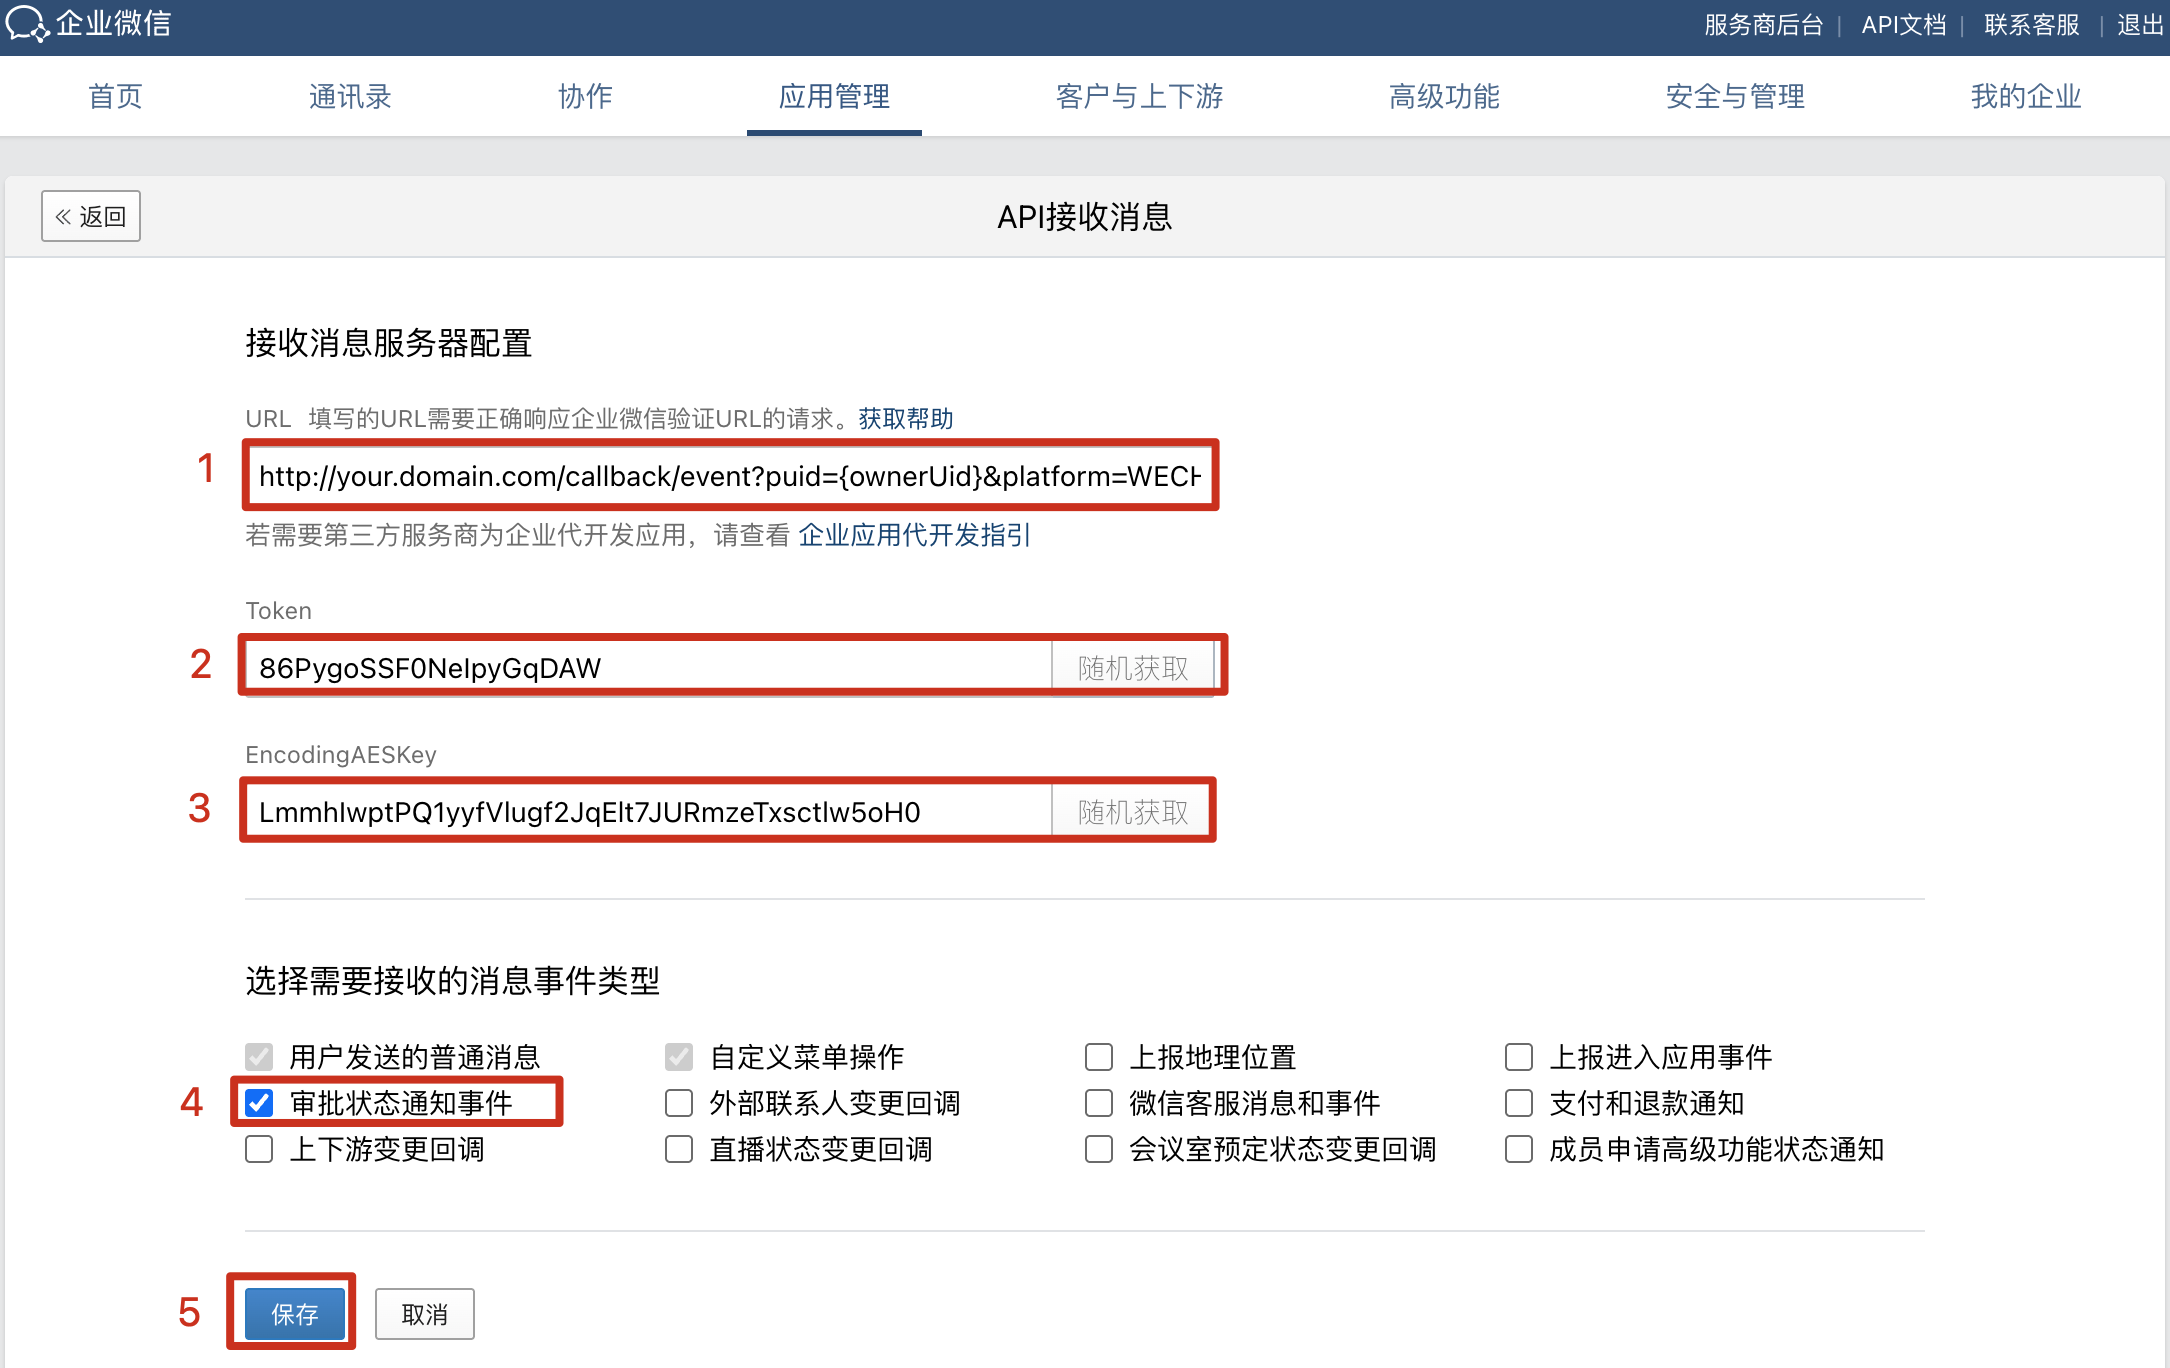
- Save the Token and EncodingAESKey in CloudDM's integration settings before you save the channel in WeCom.
- Set the message receiver URL to
http://your.domain.com/callback/event?puid={ownerUid}&platform=WECHAT&eventType=APPROVAL. To findownerUid, sign in to CloudDM as the primary account and open the avatar menu to copy its UID. - In the WeCom Approvals app, select the templates for callback notifications and the apps allowed to call the API.
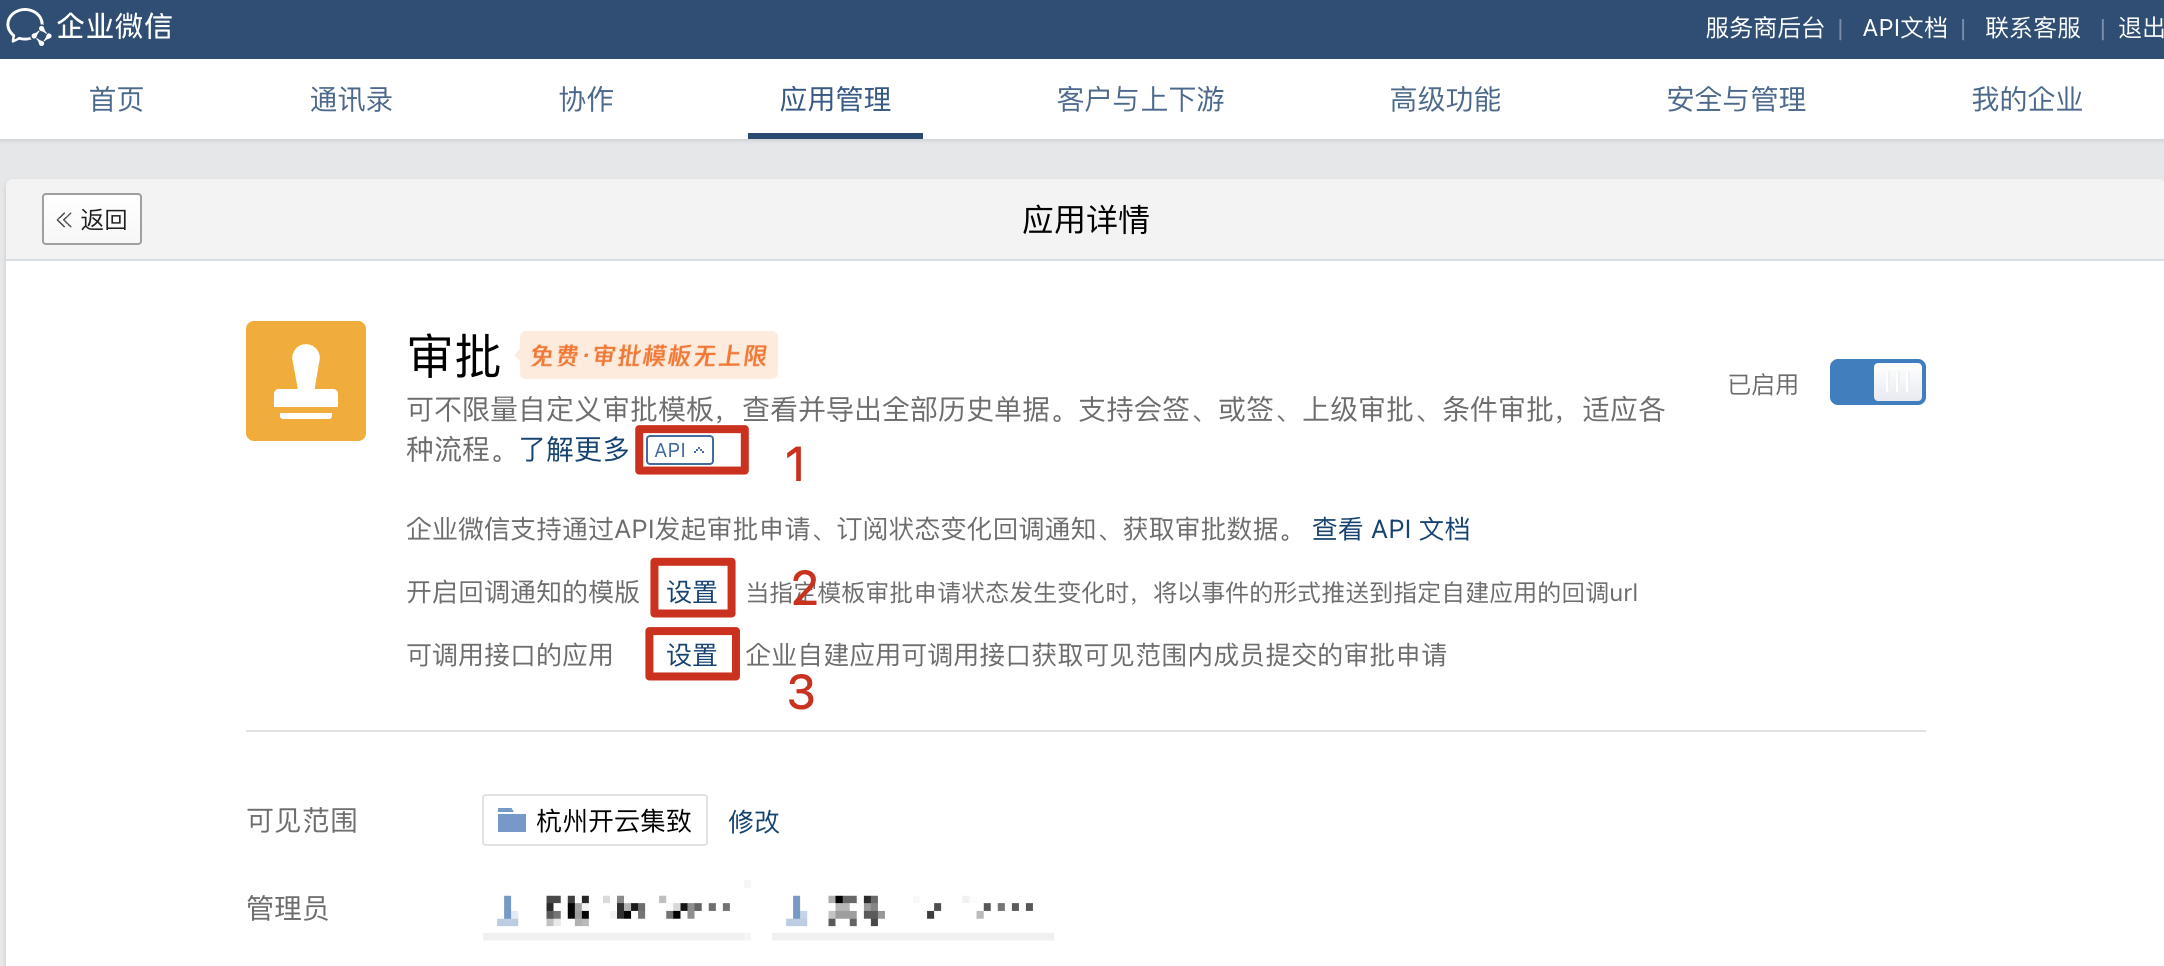
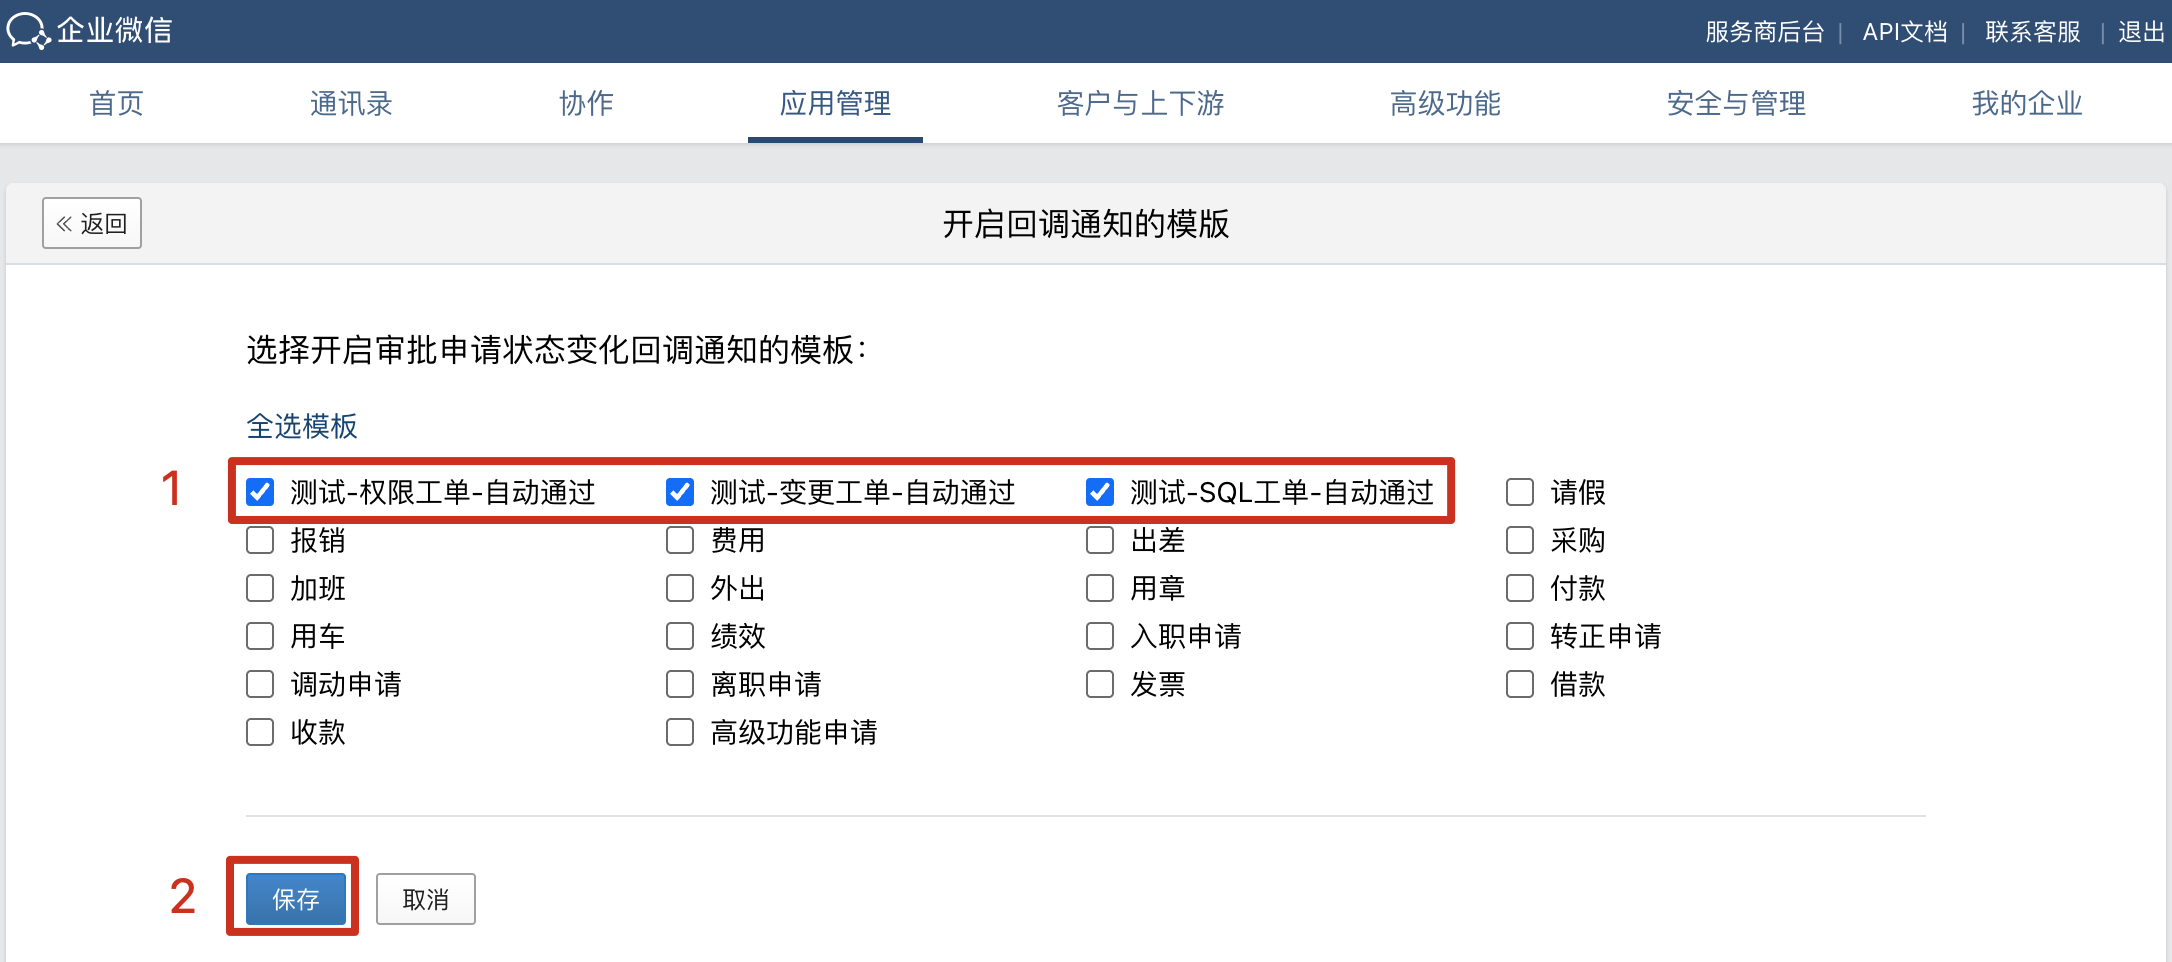
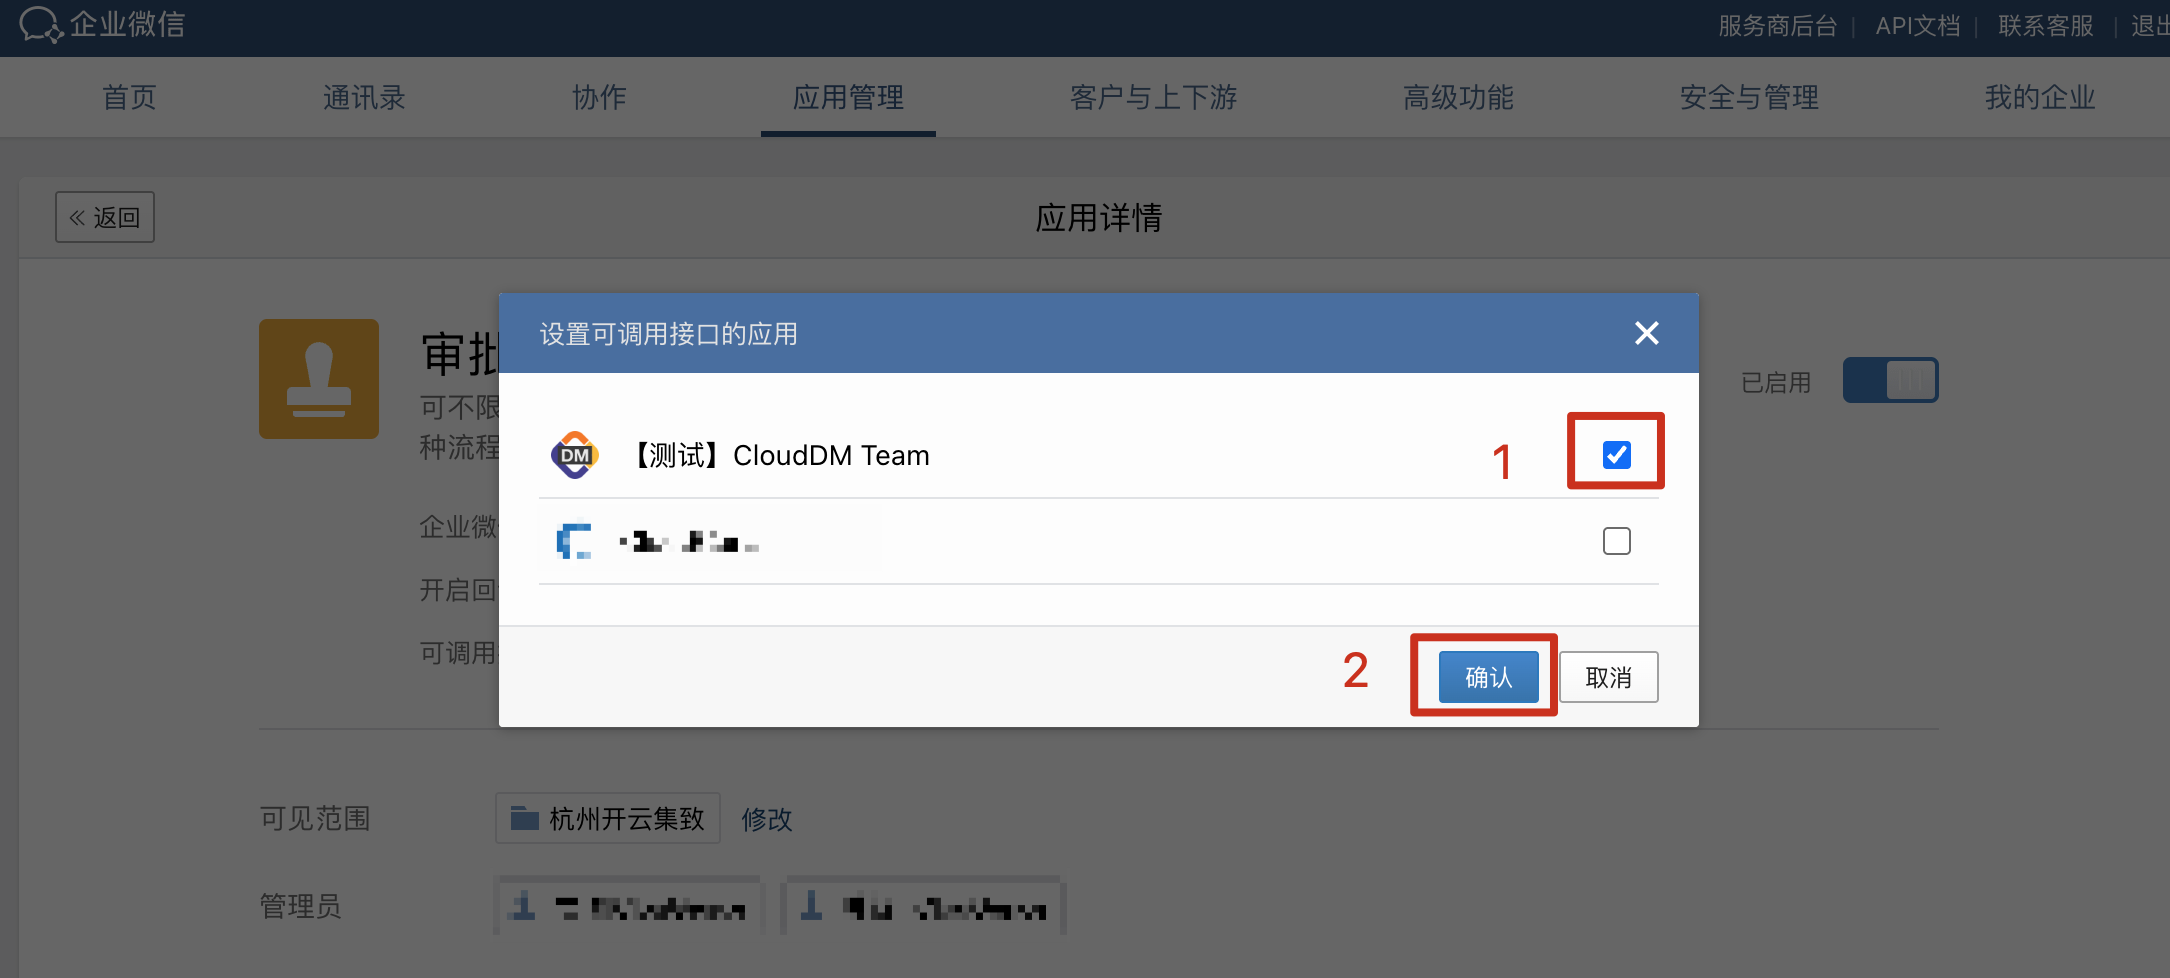
Use WeCom approvals
- In CloudDM, open Query Settings > Environments and enable tickets for the target environment.
- Select WeCom Workflow as the engine and click Add Template.
- In WeCom's Approvals > Template Management, open the template and copy the URL from the browser's address bar. Paste it into CloudDM and click Add Template.
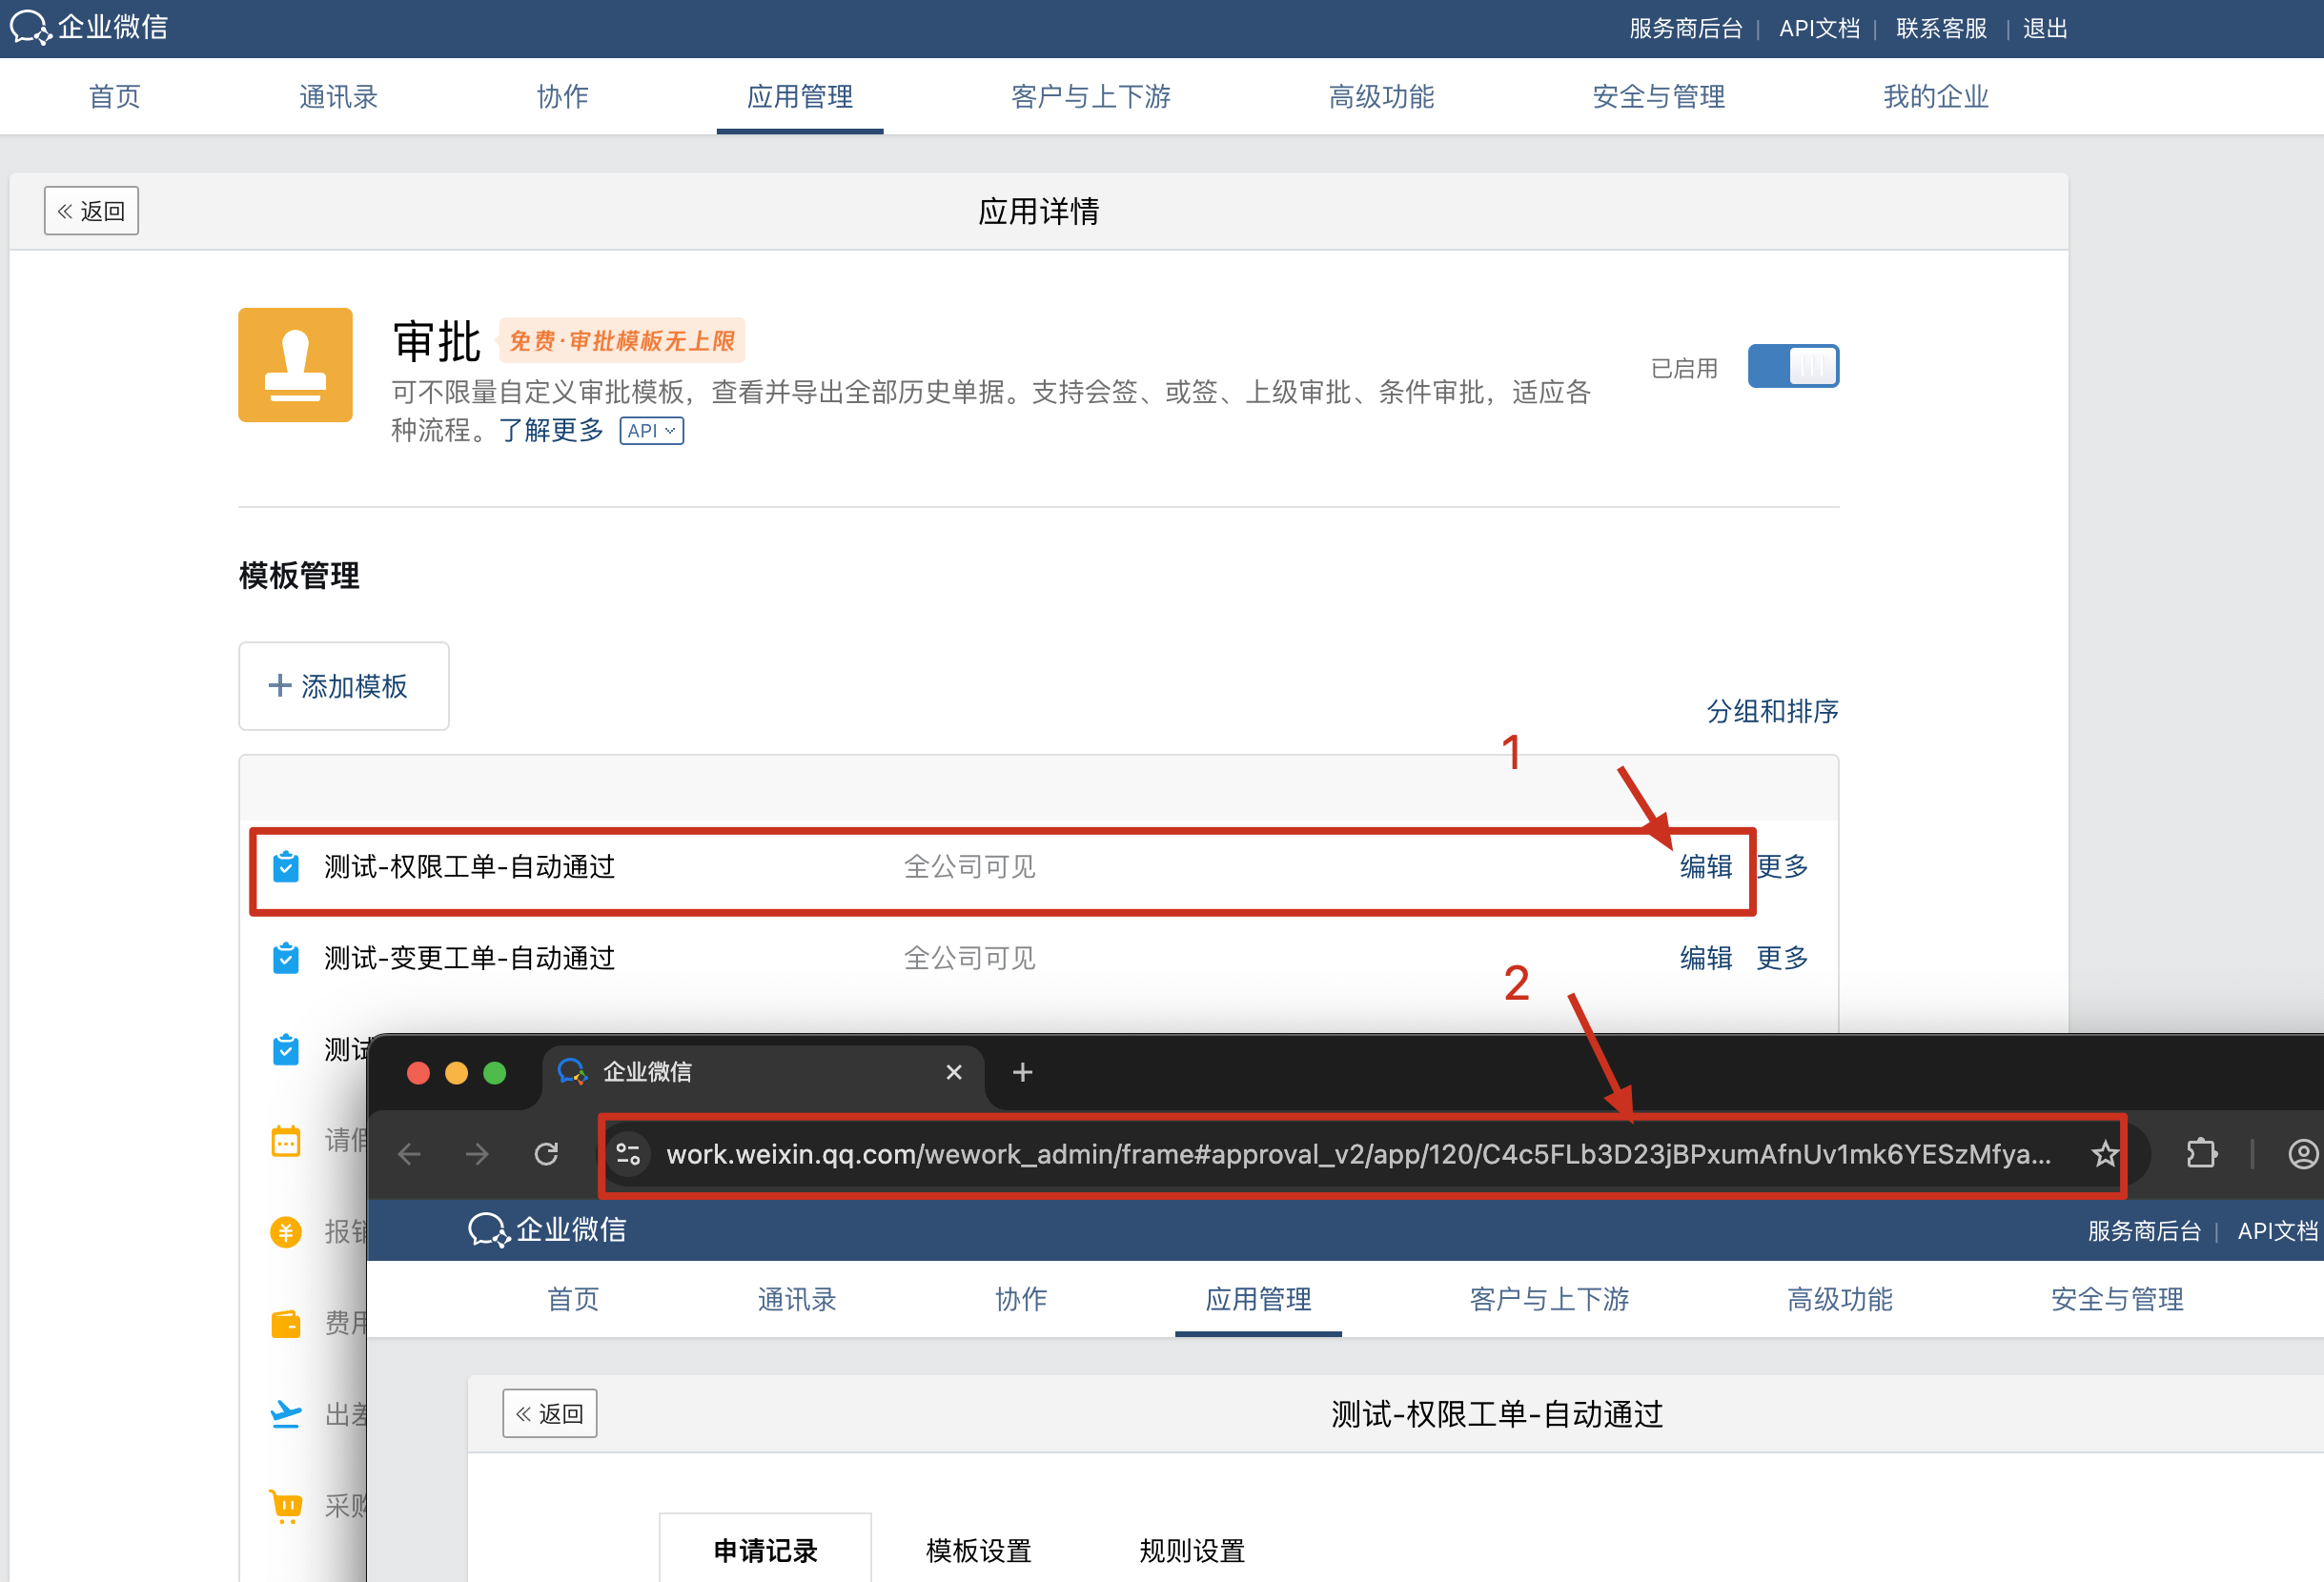
- Select the new template and click OK.